REACTOR GUIDES
Quick Start
In this guide we’ll walk you through the complete process of forking, adapting and redeploying Uniswap V2-core Smart Contracts. In the second half of this guide, we’ll also show you the basic steps to running a basic version of the Uniswap front end and integrating your own Smart Contracts.
Reference
- Uniswap V2-Core : https://github.com/Uniswap/v2-core/tree/master/contracts
- Uniswap V2 Periphery : https://github.com/Uniswap/v2-periphery
- Front end files : http://bit.ly/3XmWIIF
Creating a Project
- Navigate to arc-reactor.com and sign in using your Metamask account.
- Sign into Github in order to import projects from Github.
Please note that if your Metamask wallet auto-locks while using the Reactor you might loose some unsaved progress. We recommend that you remove any auto-timeouts on Metamask while using the ARC Reactor - From the header menu. select Project -> New
- For this guide we’ll be importing all our files from GitHub. In this case select Blank Project, and Import The Files From Github on the next step.
- Don’t forget to give your project a name
- In order to deploy the entire Uniswap V2 project, you’ll need to import Uniswap V2-Core (Also called Factory) and deploy these contracts before importing Uniswap V2-periphery.
-
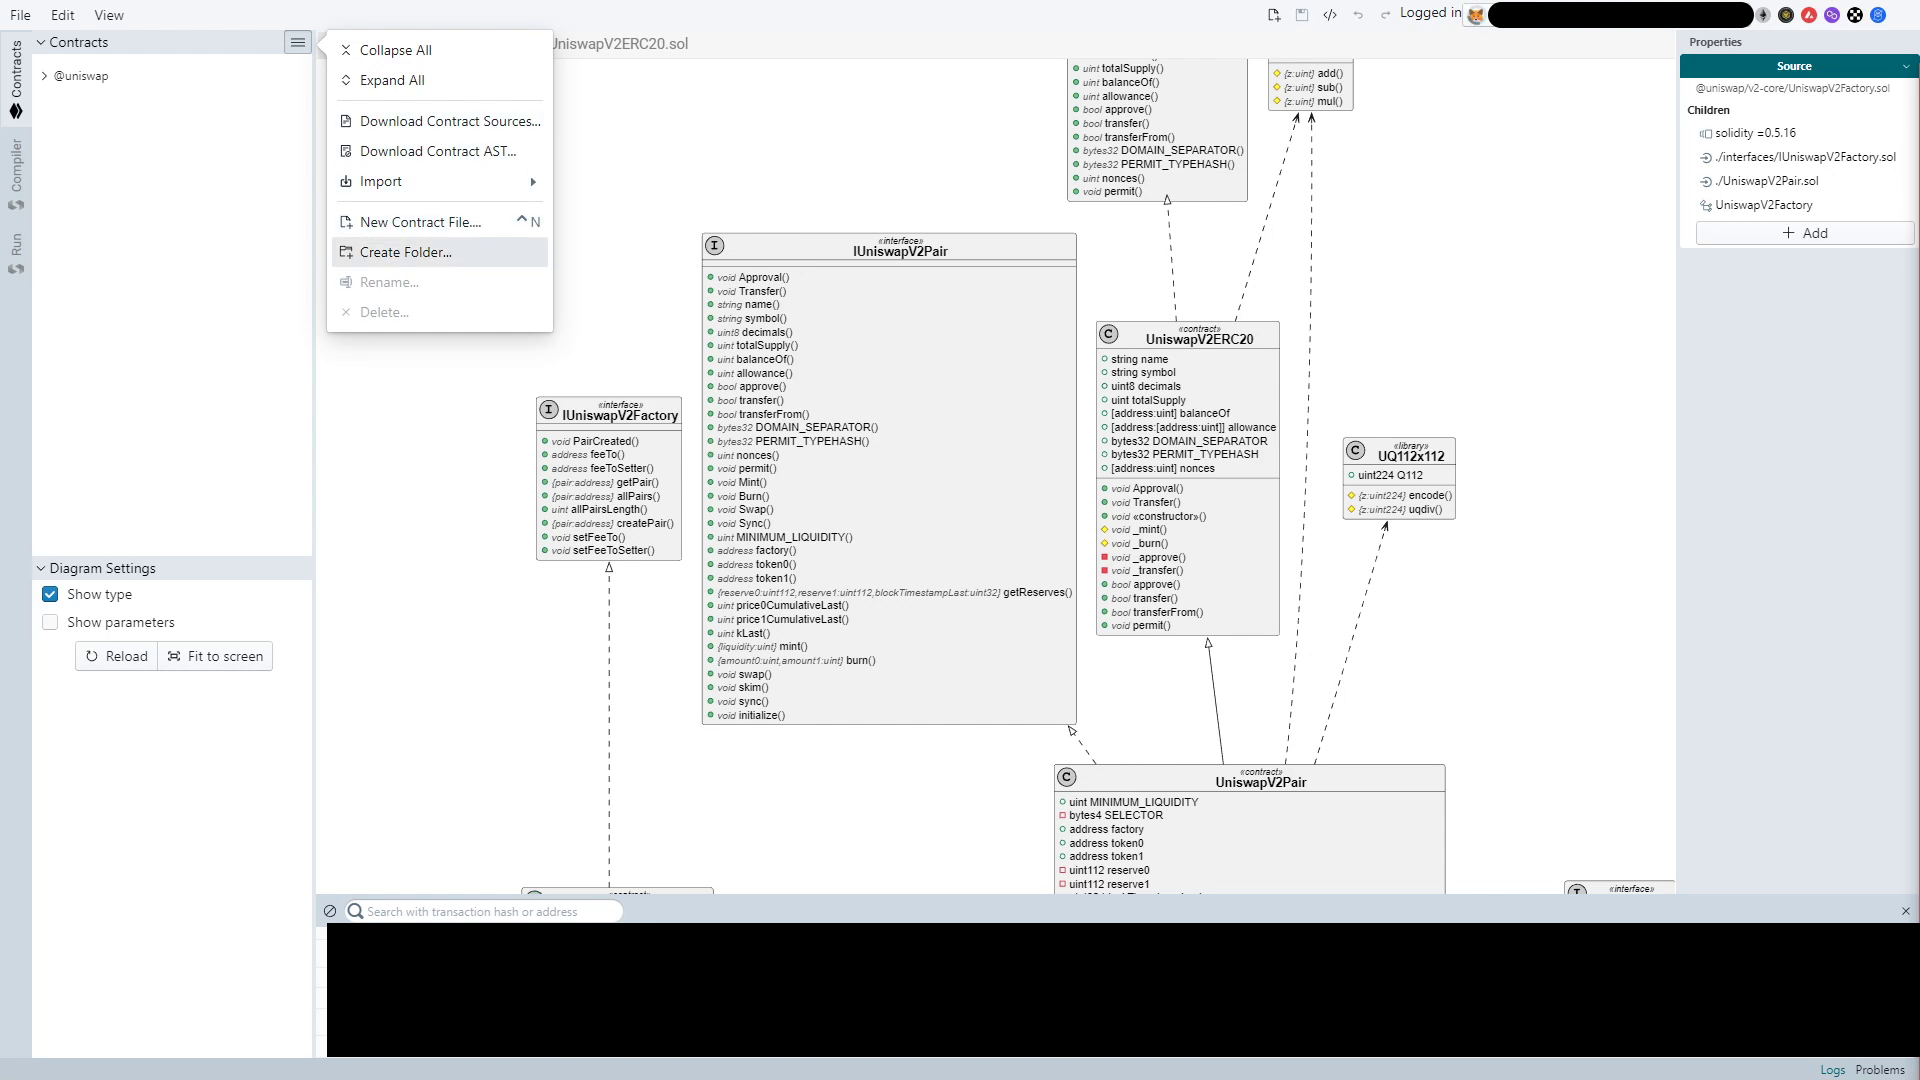
Create a new folder from the sidebar menu called “@uniswap”. We’ll use this directory to import all our contracts. Inside our @uniswap folder, create a new folder called “v2-core/contracts”.
-
Create a new folder from the sidebar menu called “@uniswap”. We’ll use this directory to import all our contracts. Inside our @uniswap folder, create a new folder called “v2-core/contracts”.

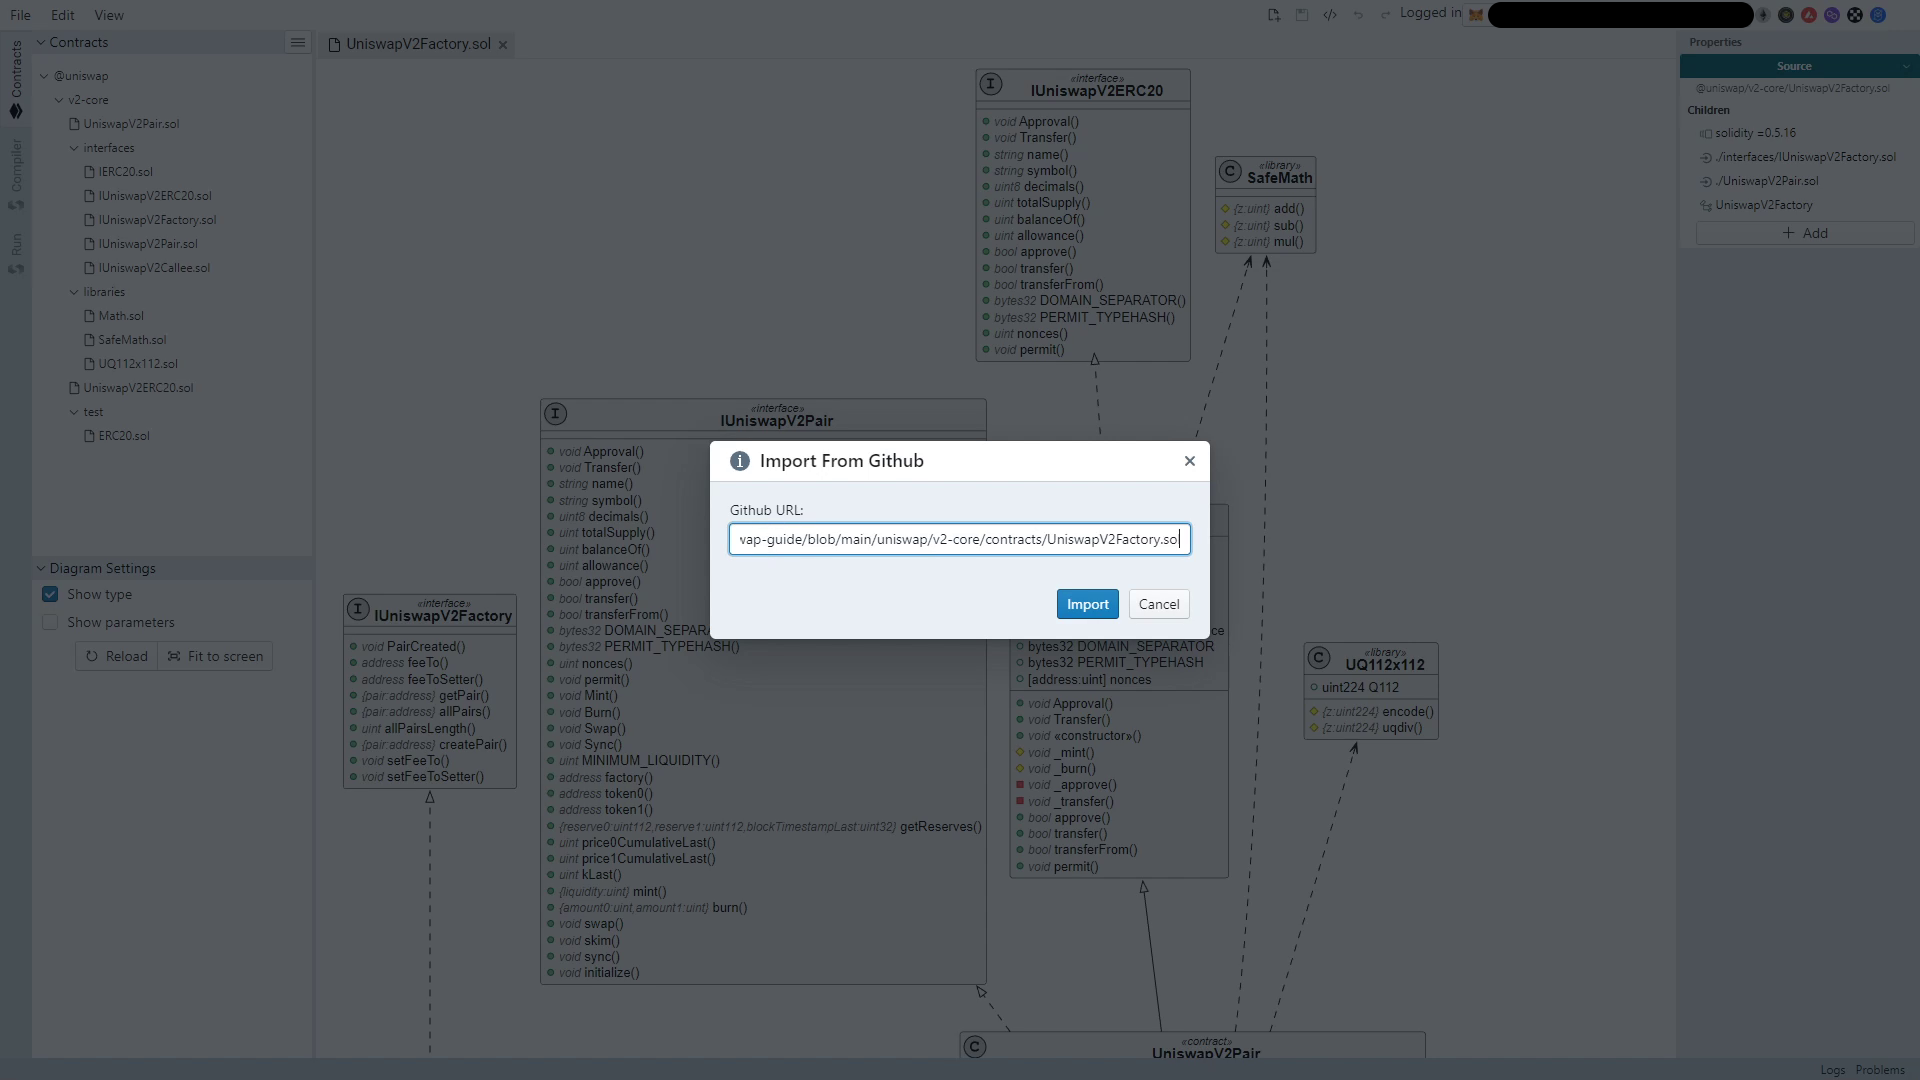
- Input the UniswapV2-core GitHub URL https://github.com/Uniswap/v2-core/tree/master/contracts
- finally select ‘Import’
That’s it, we’ve now imported our Uniswap V2 Core contracts.
Editing Uniswap Factory
Please note that the ARC Reactor features a powerful auto-compiler. Please turn the auto compiler on for all projects in this guide.
First off you’ll change the contract's name and symbol. Thereafter you’ll add a function to grab the hash of the contract. This process will illustrate how to translate lines of code into diagrams. We do have an existing file with the INIT_CODE_HASH function added in case you’d like to skip this step. For full documentation on all functions of each diagram, please refer to our docs. https://reactor-docs.arc.market
Editing the name and symbol
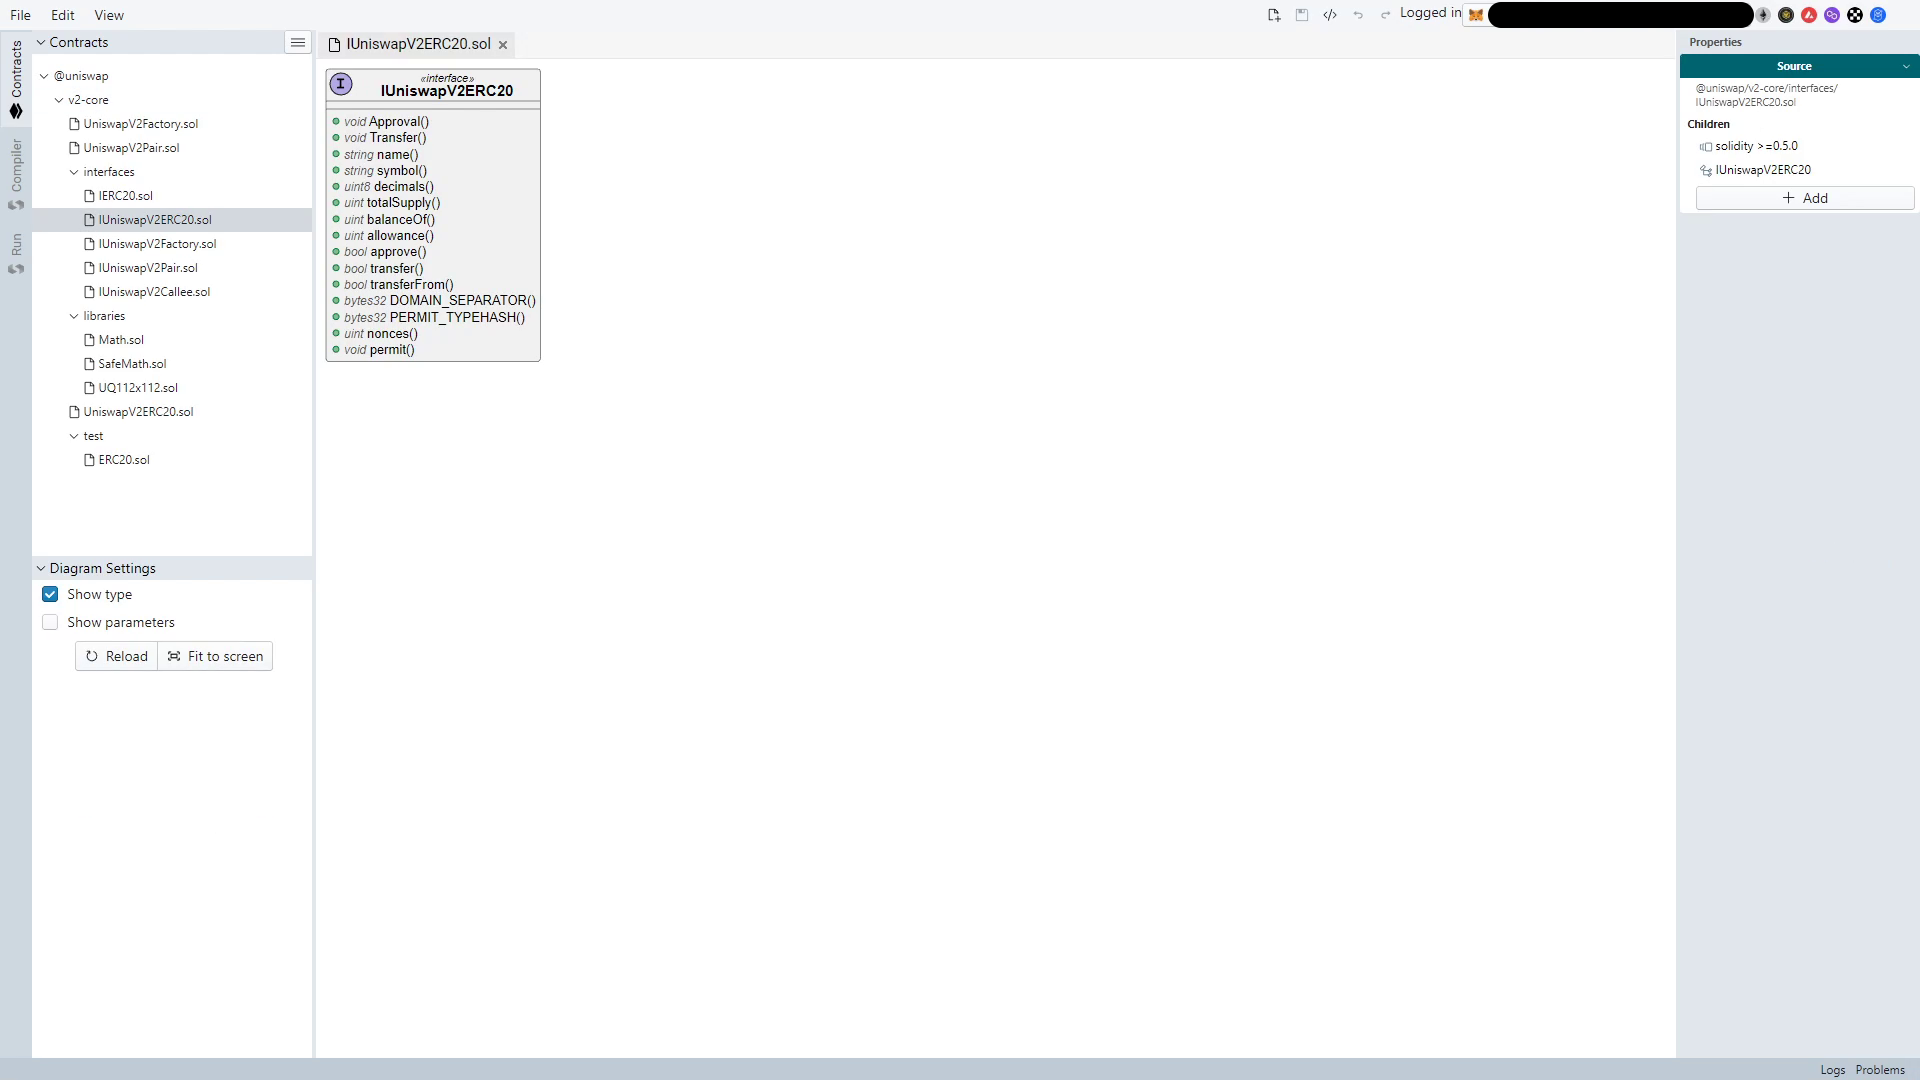
- To edit the name, select the UniswapV2ERC20.sol file and select the UniswapV2ERC20 contract.
- Select the ‘name’ variable and change the ‘name’ value to ‘MyToken’
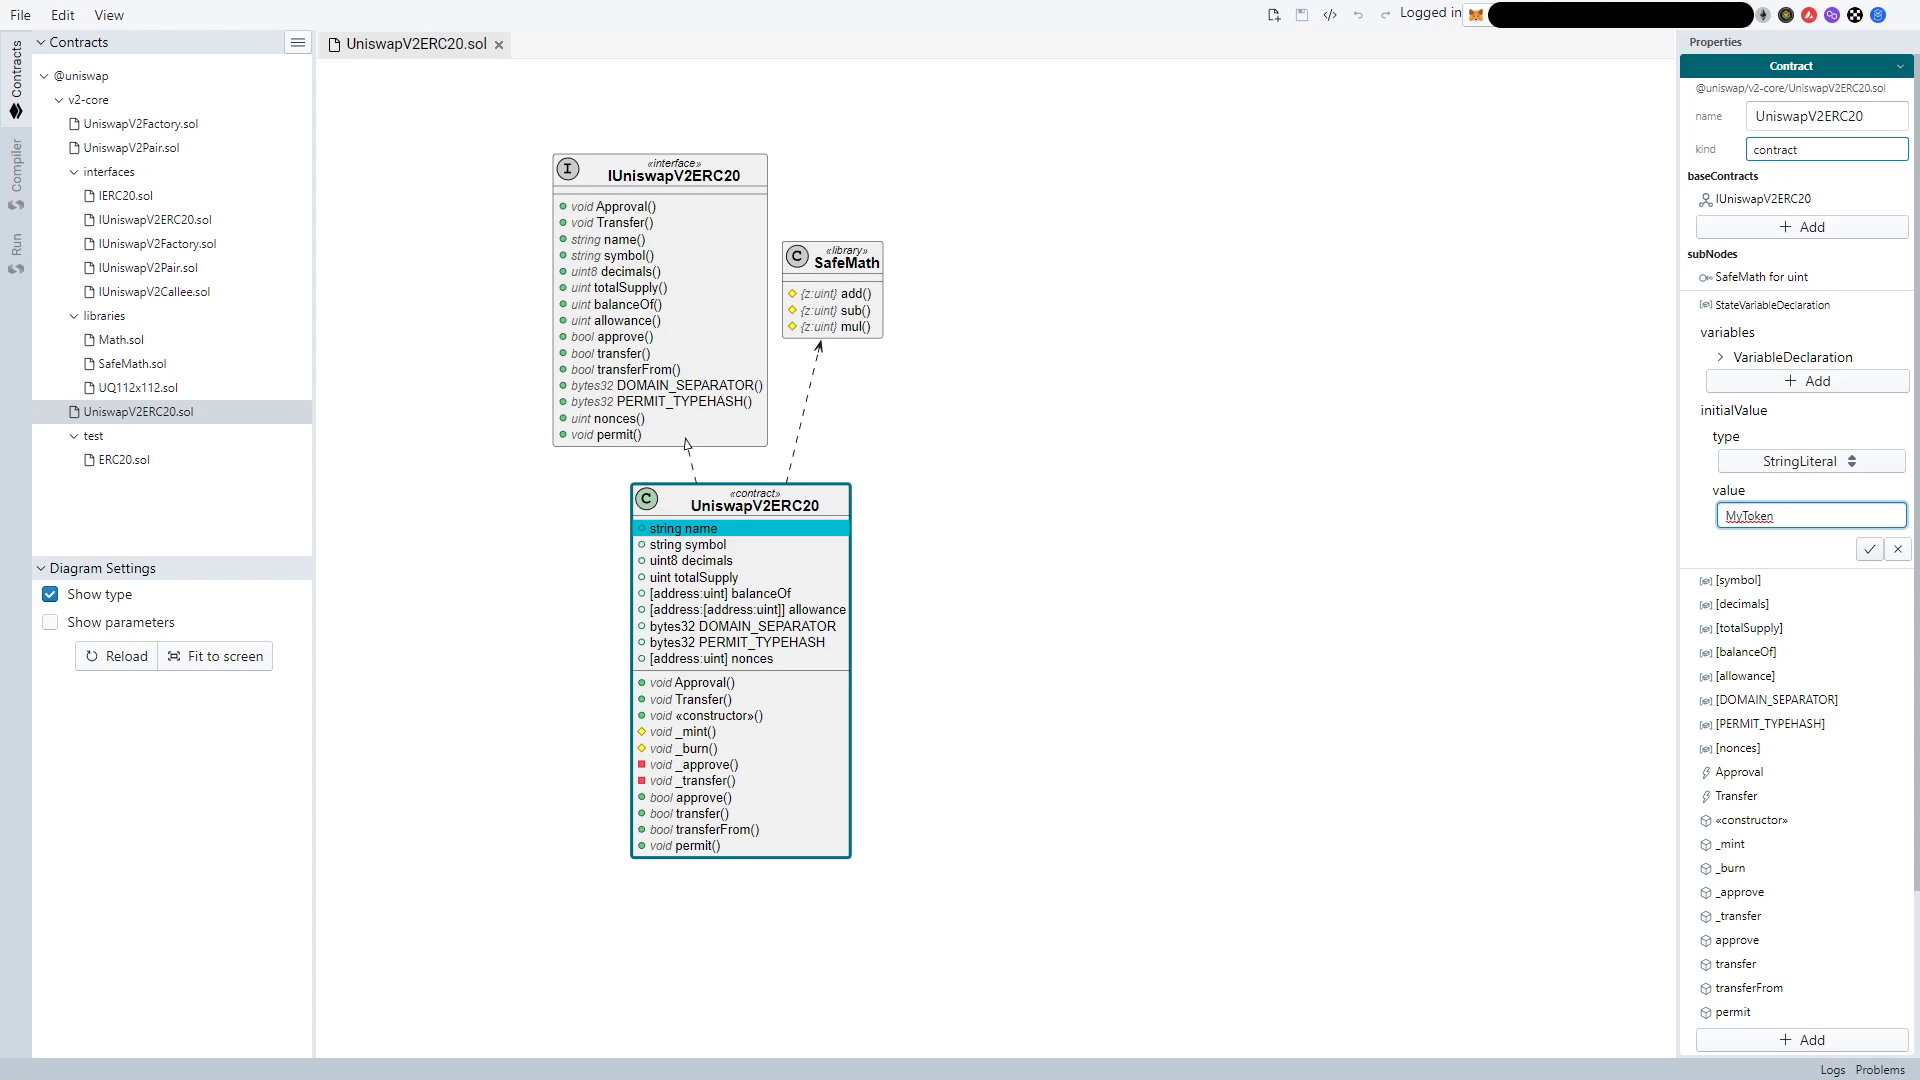
- Click on the checkmark to commit the changes to your file
- To edit the symbol, select the ‘symbol’ variable and the ‘symbol’ value to TKEN
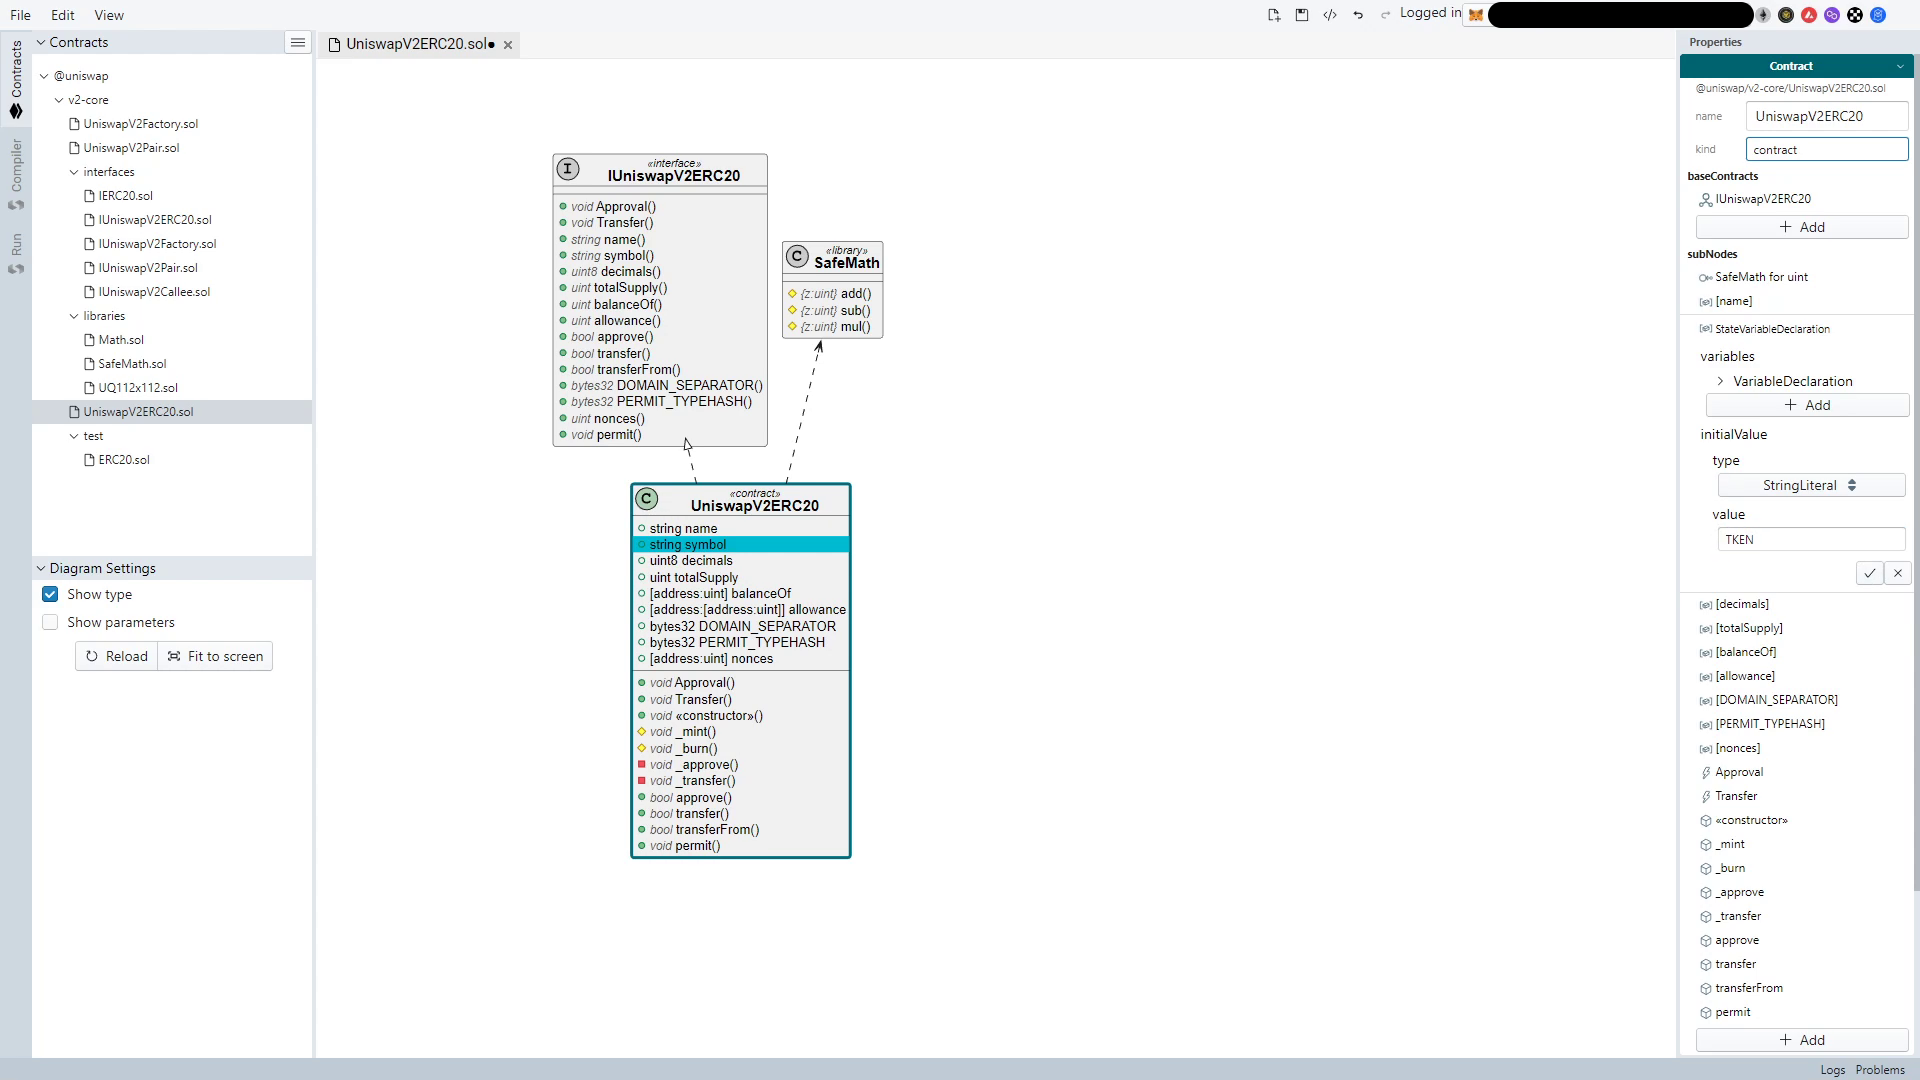
- Click on the checkmark to commit the changes to your file
Adding the INIT_CODE_HASH function
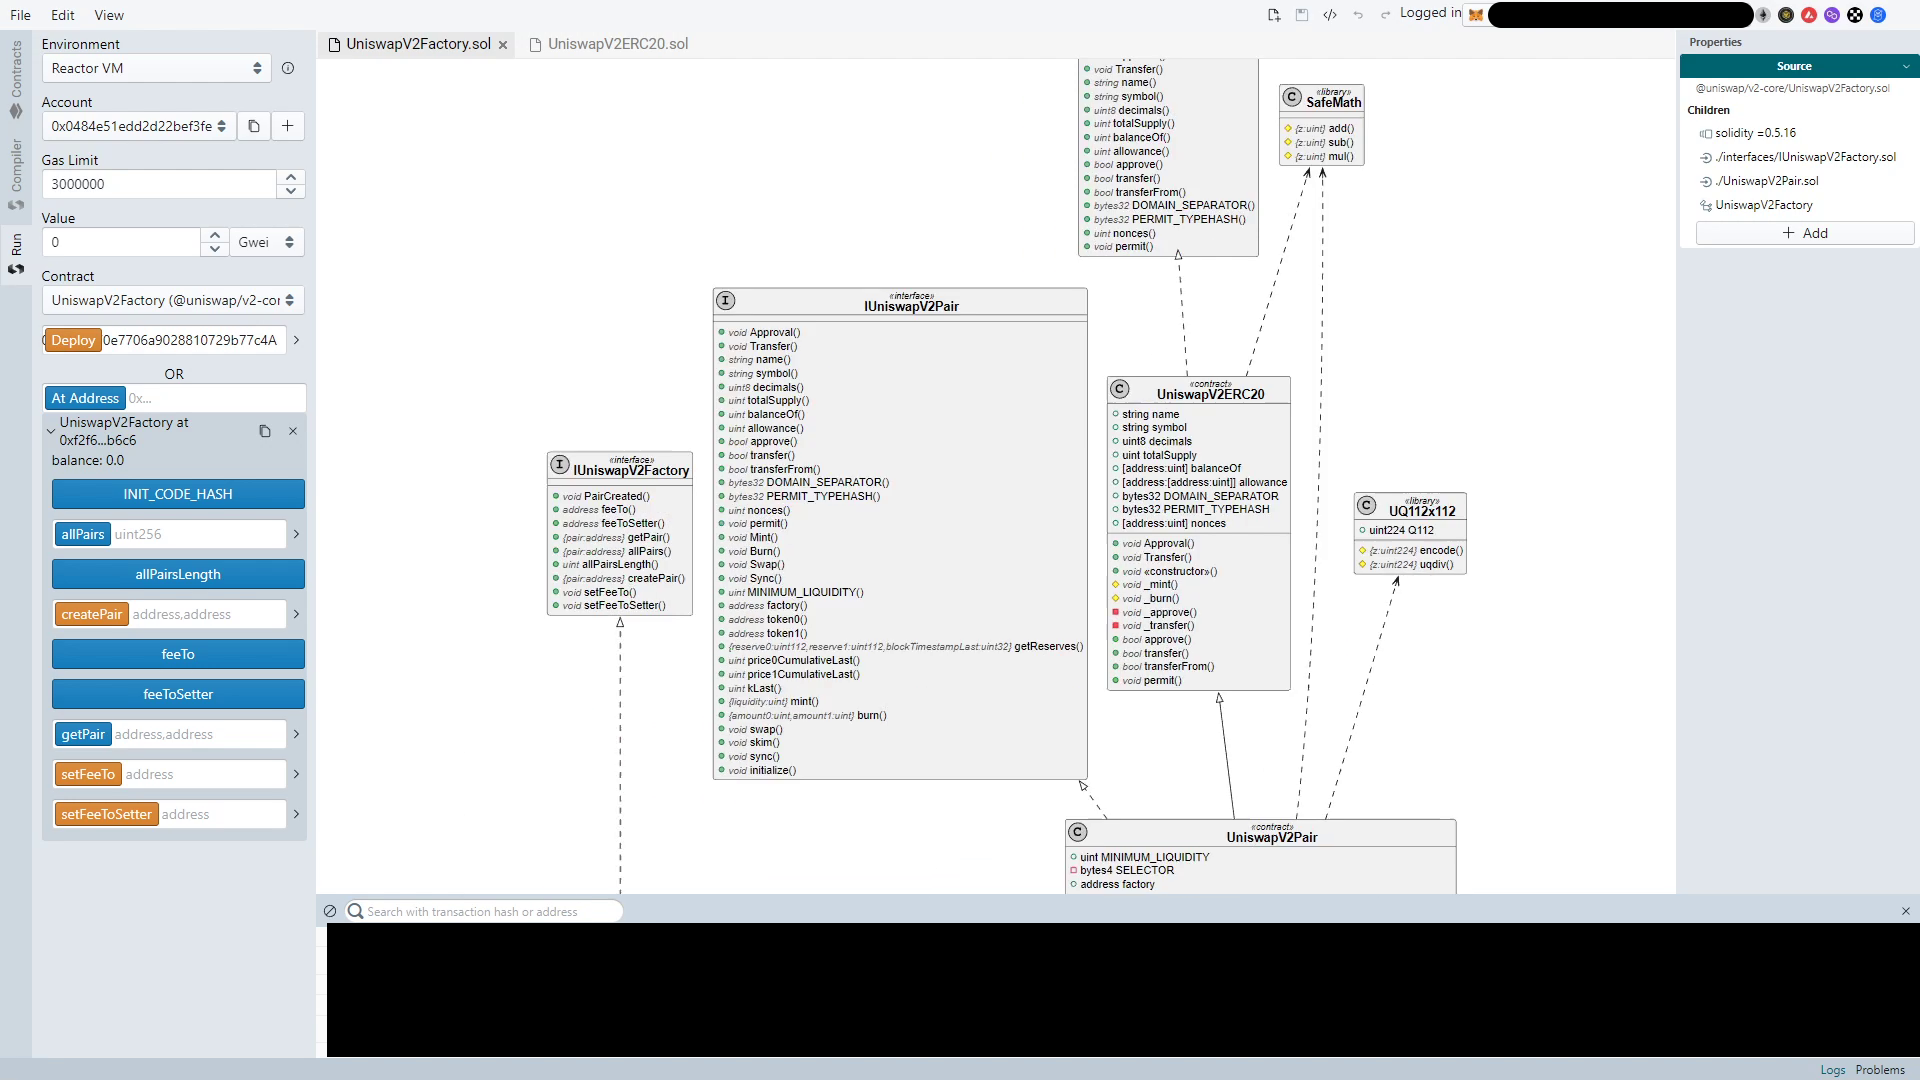
- To add the INIT_CODE_HASH function, first navigate to UniswapV2Factory.sol
- Select the UniswapV2Factory contract
- On the right pane, you will see a list of subNodes. For a reference as to what subNodes are please see our documentation.
- Add a new subnode
- First off, lets set initialValue’s type to FunctionCall
- In expression -> type, select Identifier
- In expression -> type - name input ‘keccak256’
- In arguments, set type to FunctionCall, then set expression type to Identifier and set name to ‘abi’ and memberName to ‘econdePacked’
- n arguments, set type to MemberAccess, set type to FunctionCall
- Set the expression type to Identifier
- Set the expression name to type
- For arguments, set type to Identifier and name to ‘UniswapV2Pair’
- Finally, set the memberName to creationCode
- Hit the check box to commit the changes
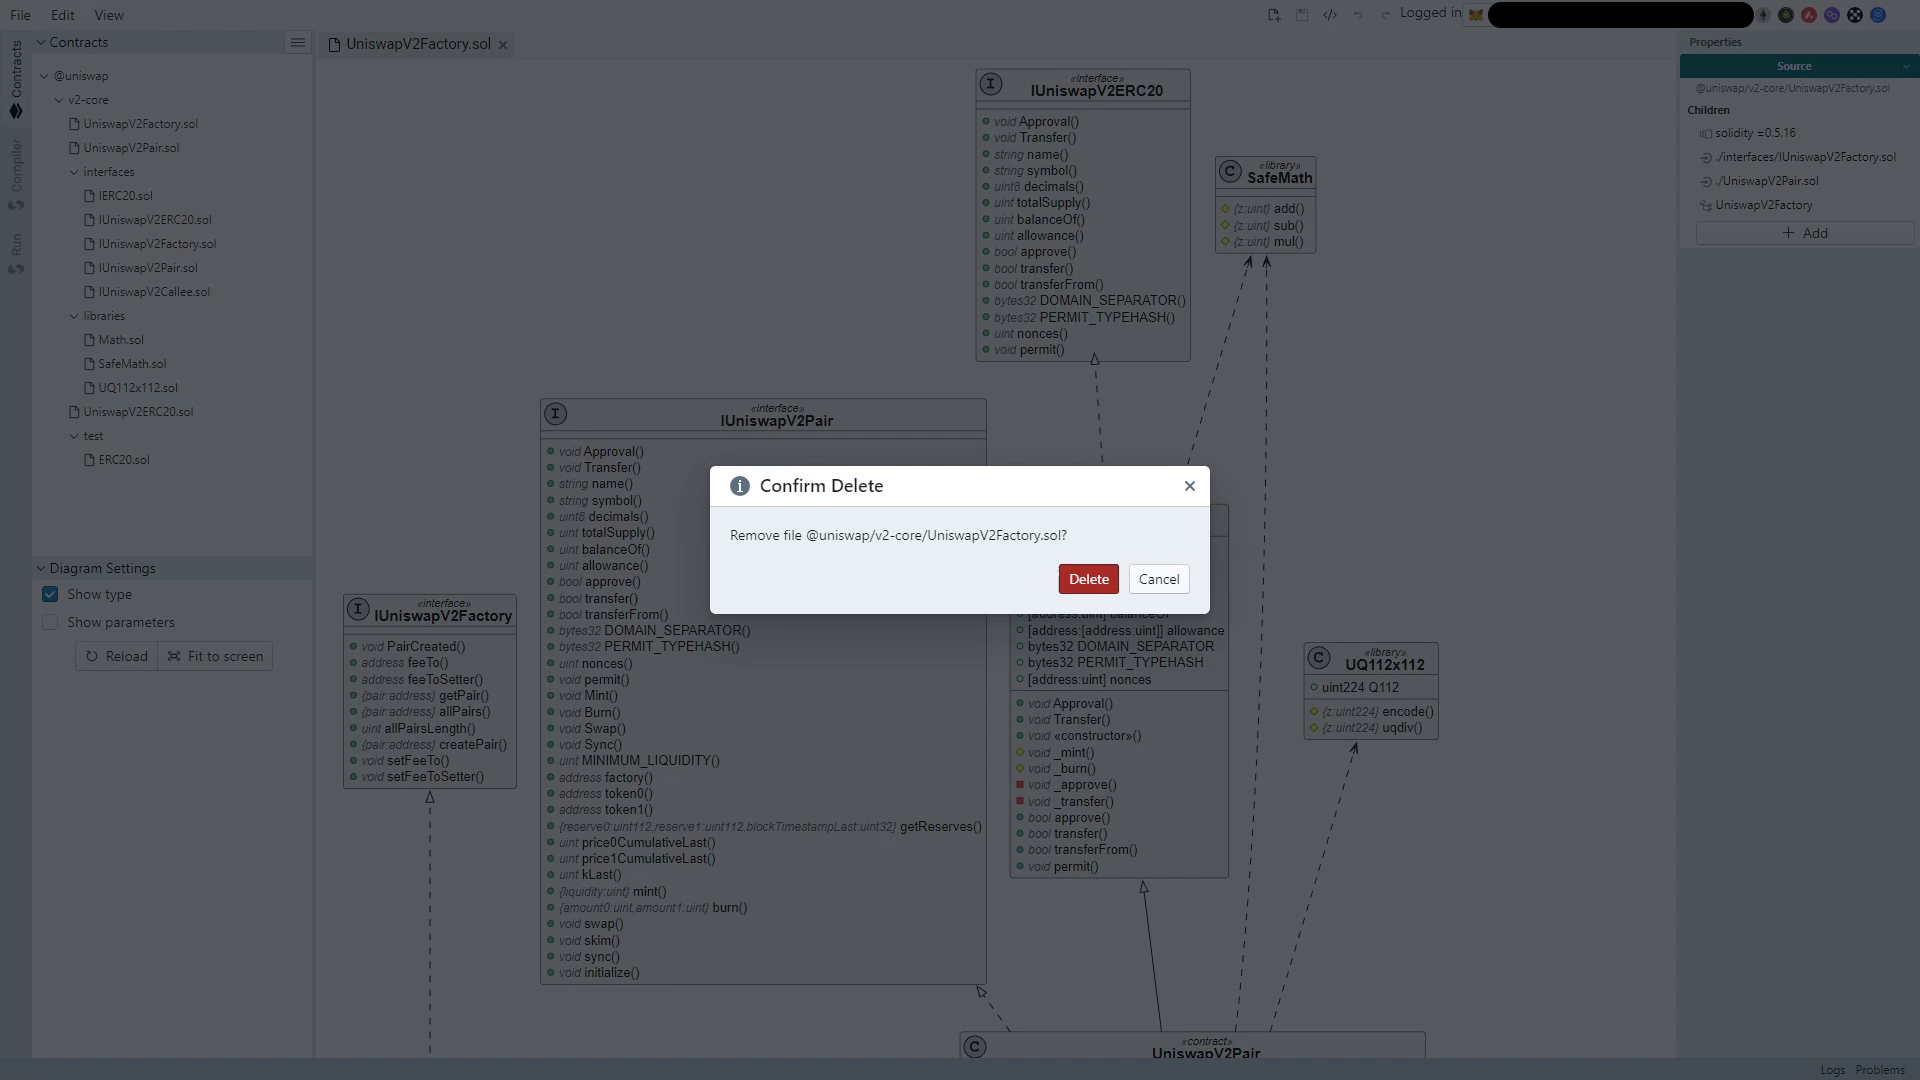
If you’d prefer to skip this step, you can import this file and delete the existing UniswapV2 Factory: https://github.com/ARC-MARKET/arc-uniswap/blob/main/uniswap/v2-core/contracts/UniswapV2Factory.sol
That’s it! We can now use this INIT_CODE_HASH function to get our contract hash which we’ll need later on.
Compiling and Debugging
If the auto-compiler is turned on, your project should be compiled and as long as there are no problems in the problems tab, you can move on to the next step. Please ensure you’ve enabled optimizations and set the optimizations value to 1.
If your auto-compiler is turned off, navigate to the compiler tab and select the Uniswap V2 Factory contract and click on ‘Compile’. If there are no problems in the problems tab, you can move on to the next step.
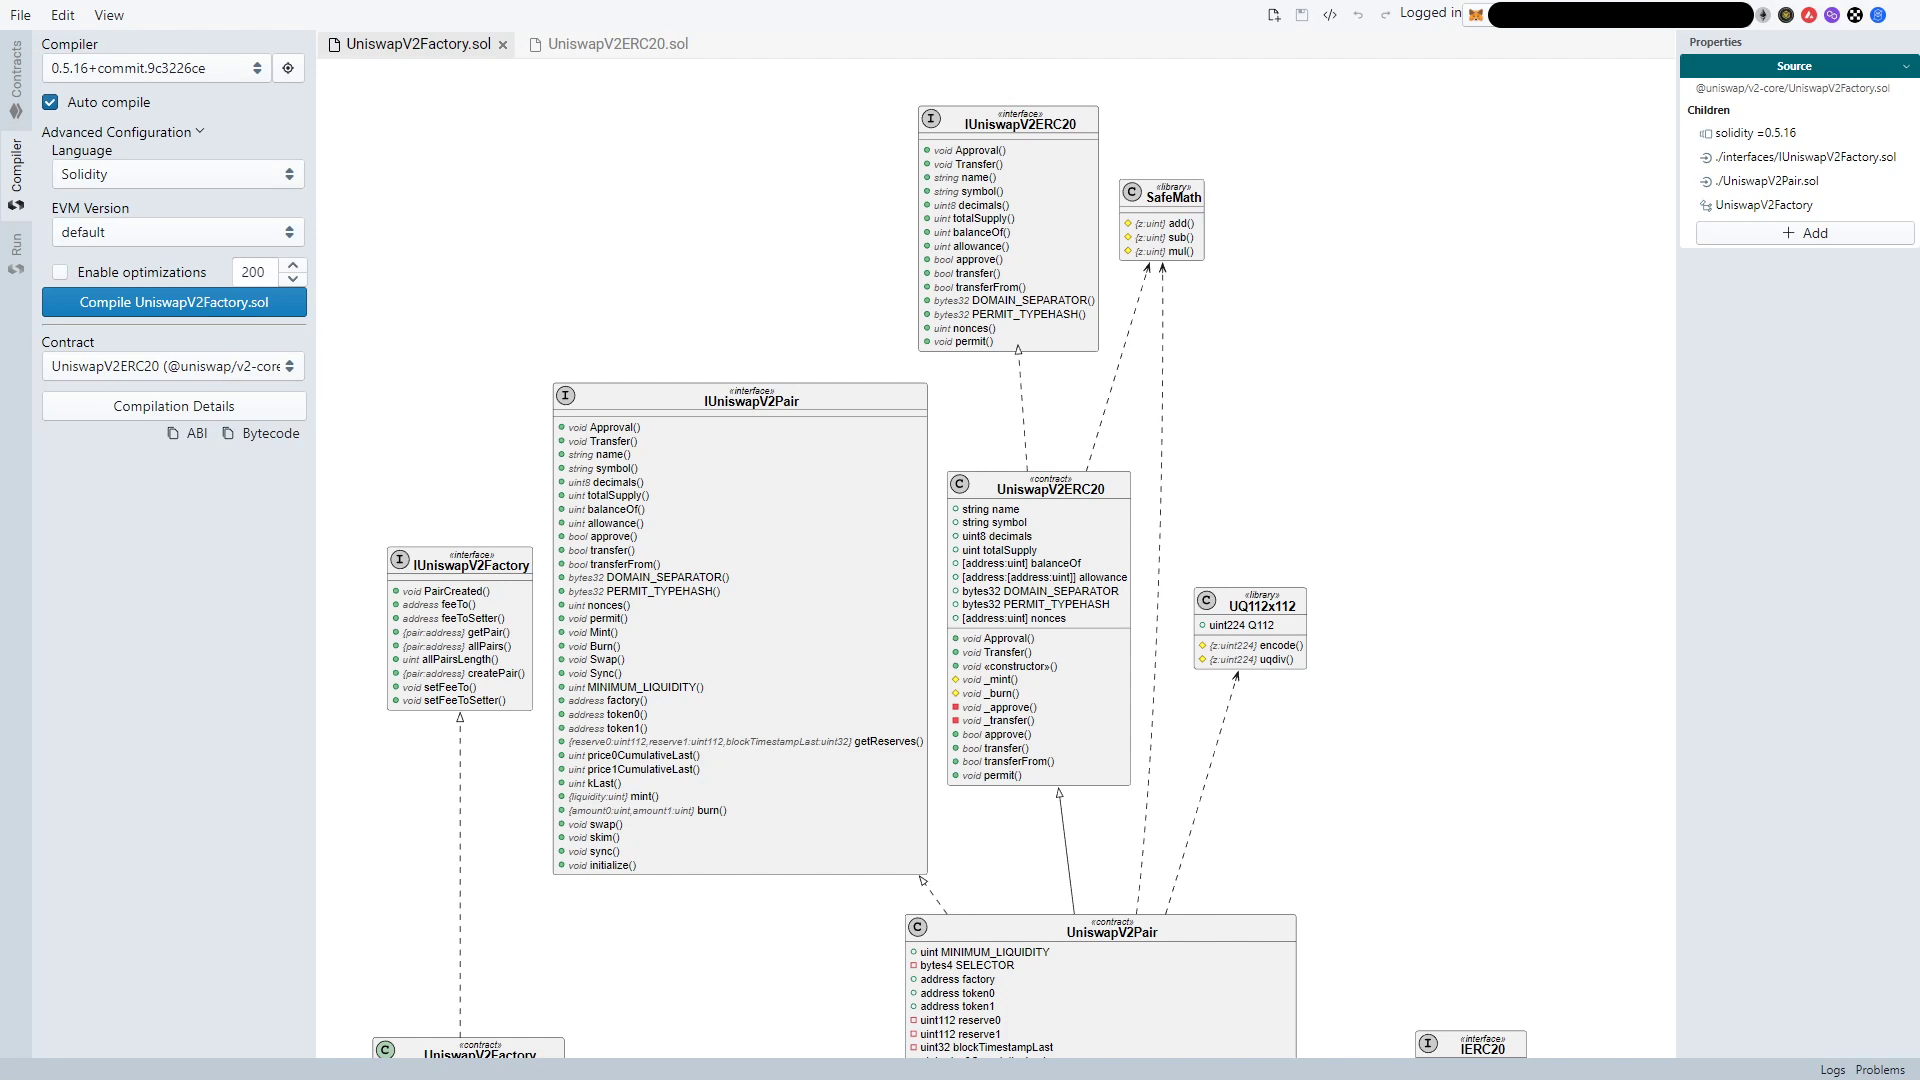
If you there are problems in the problems tab, please refer to your guide on how to debug problems: https://ip.arc-reactor.com/guides/workflow#identify
Deploying Uniswap V2-Factory
- Navigate to the deploy tab and select the Uniswap V2-Factory contract.
- Here you have two options, to test the contract on your local machine you can use the Reactor VM environment. If you’re ready to commit this project to mainnet you can select ‘Injected Web3’ which will use the chain your Metamask wallet is connected to (in the current build the supported chains are: Ethereum, Polygon, Polygon ZK Testnet, Fantom, and Avalanche).
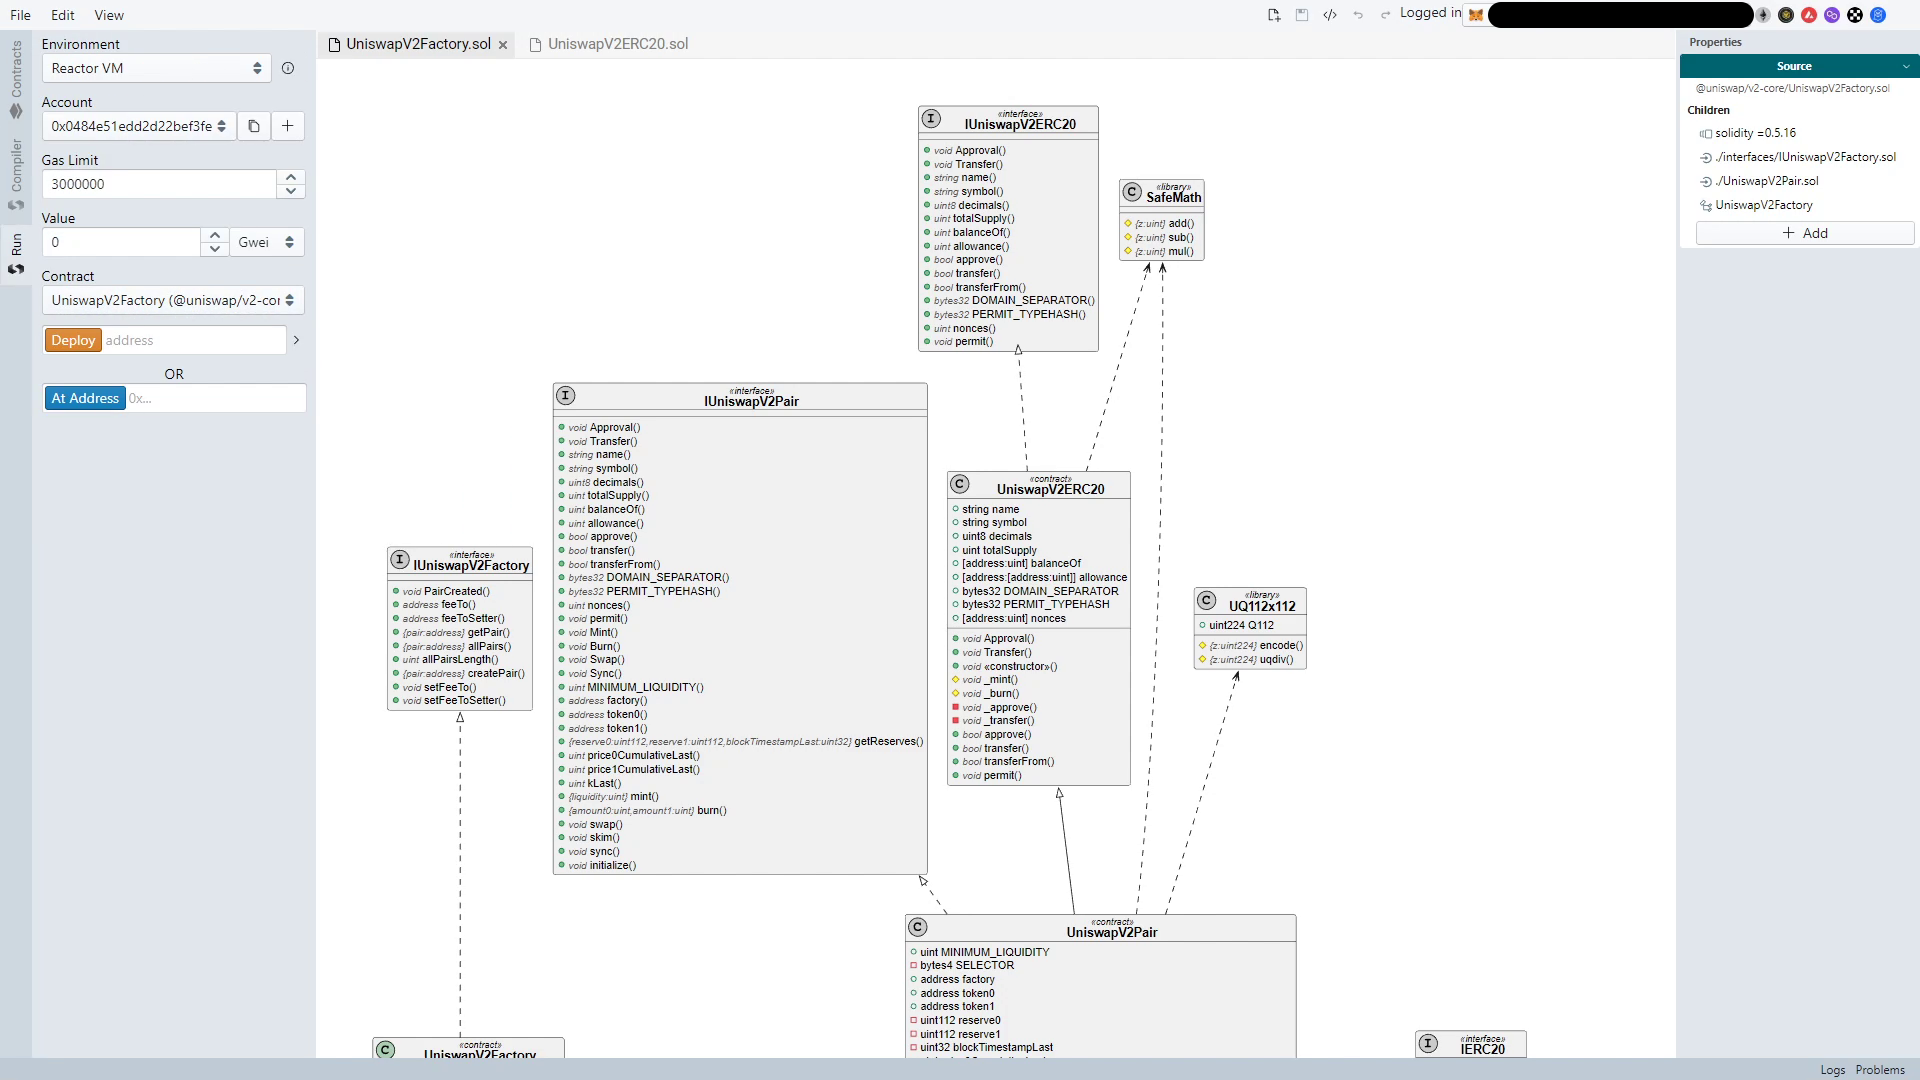
- To deploy the contract you can insert your wallet address in the ‘address’ field and click on the ‘deploy’ button.

- Accept the metamask prompt to deploy the contract to the Ethereum blockchain
- Once the deployment is complete you can see the deployment details in the ‘Logs’ console.
- You will also be able to see all contract functions in the Run tab
- Let’s call ‘INIT_CODE_HASH’ to get our contracts hash. Store this value somewhere.
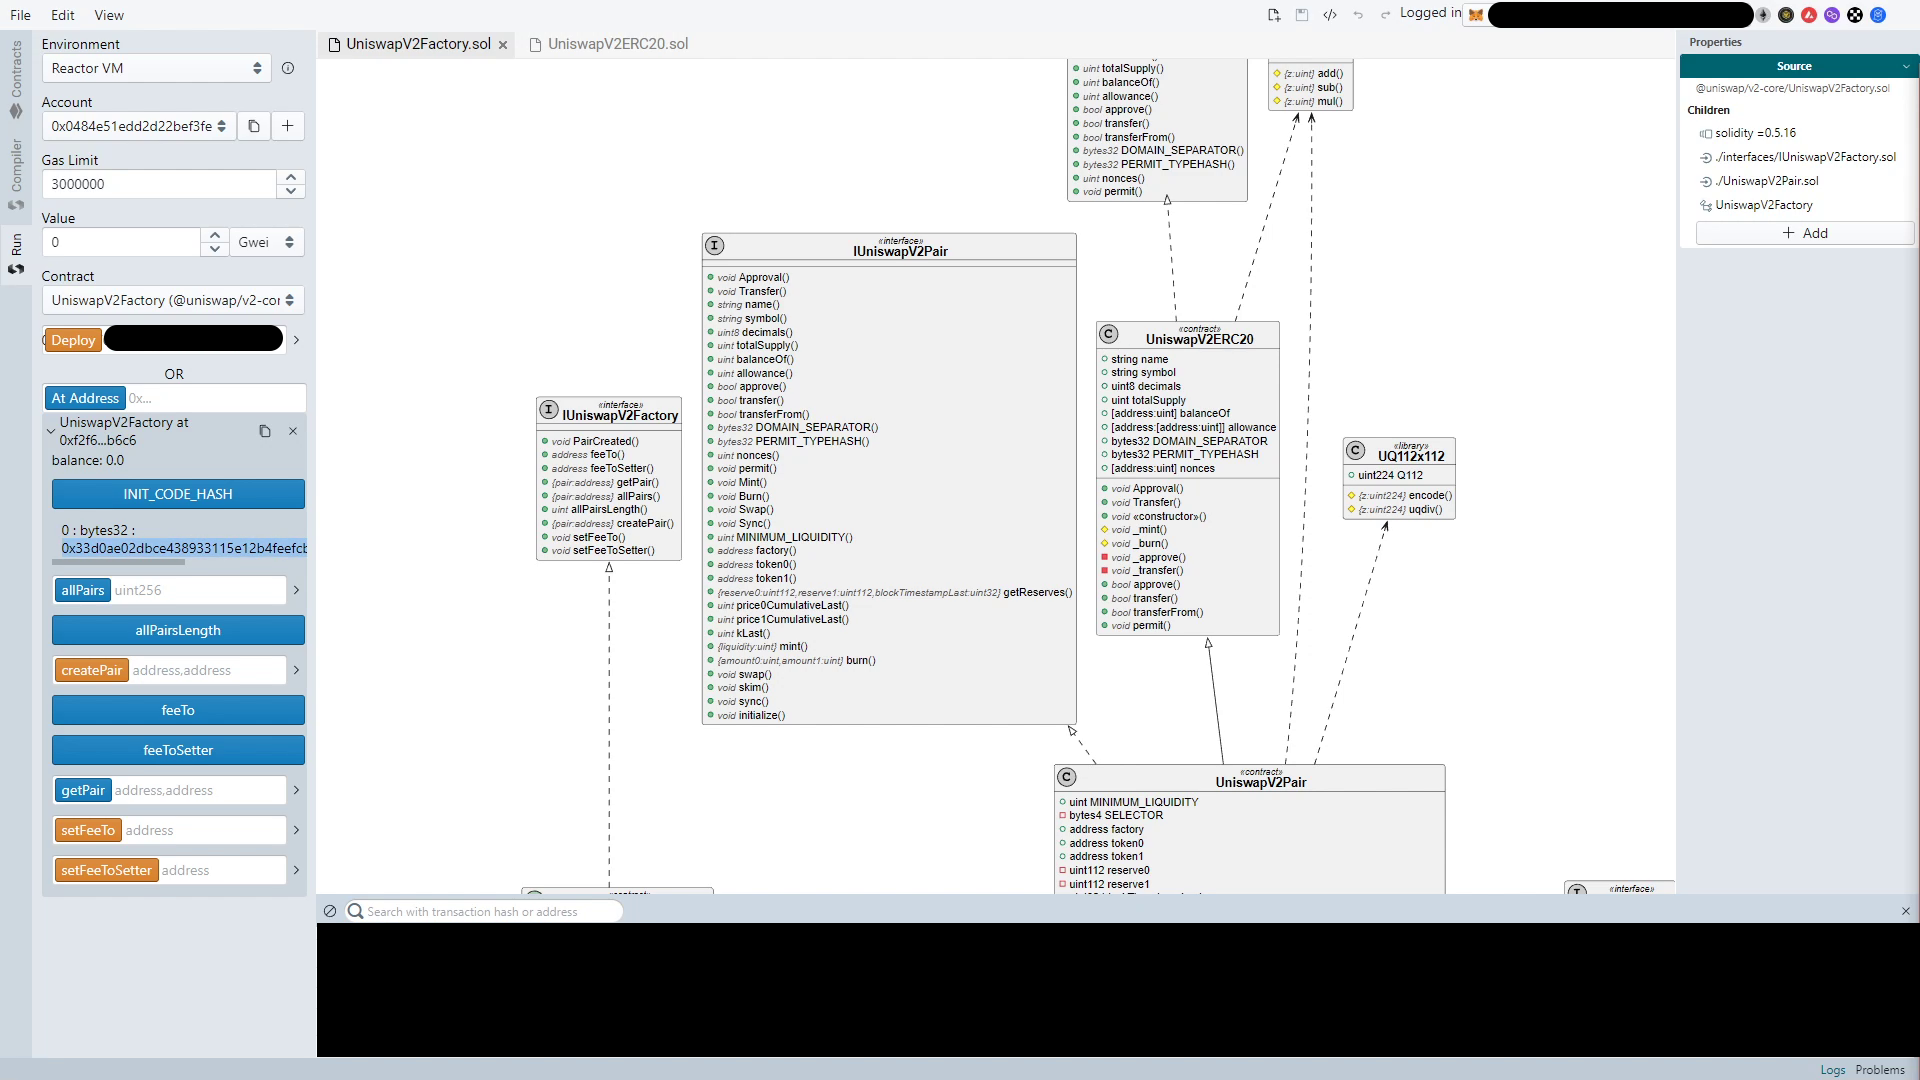
It will look something like this:
0x33d0ae02dbce438933115e12b4feefcb296d98c7f79c5df5534a3cd9c6d93d1f - You will also have to copy the contracts address and store that as well as we’ll need it later on
0xf2f659fa32c0dca71fa01d42d05158cf9082b6c6 - We’ve now successfully deployed the UniswapV2 Factory
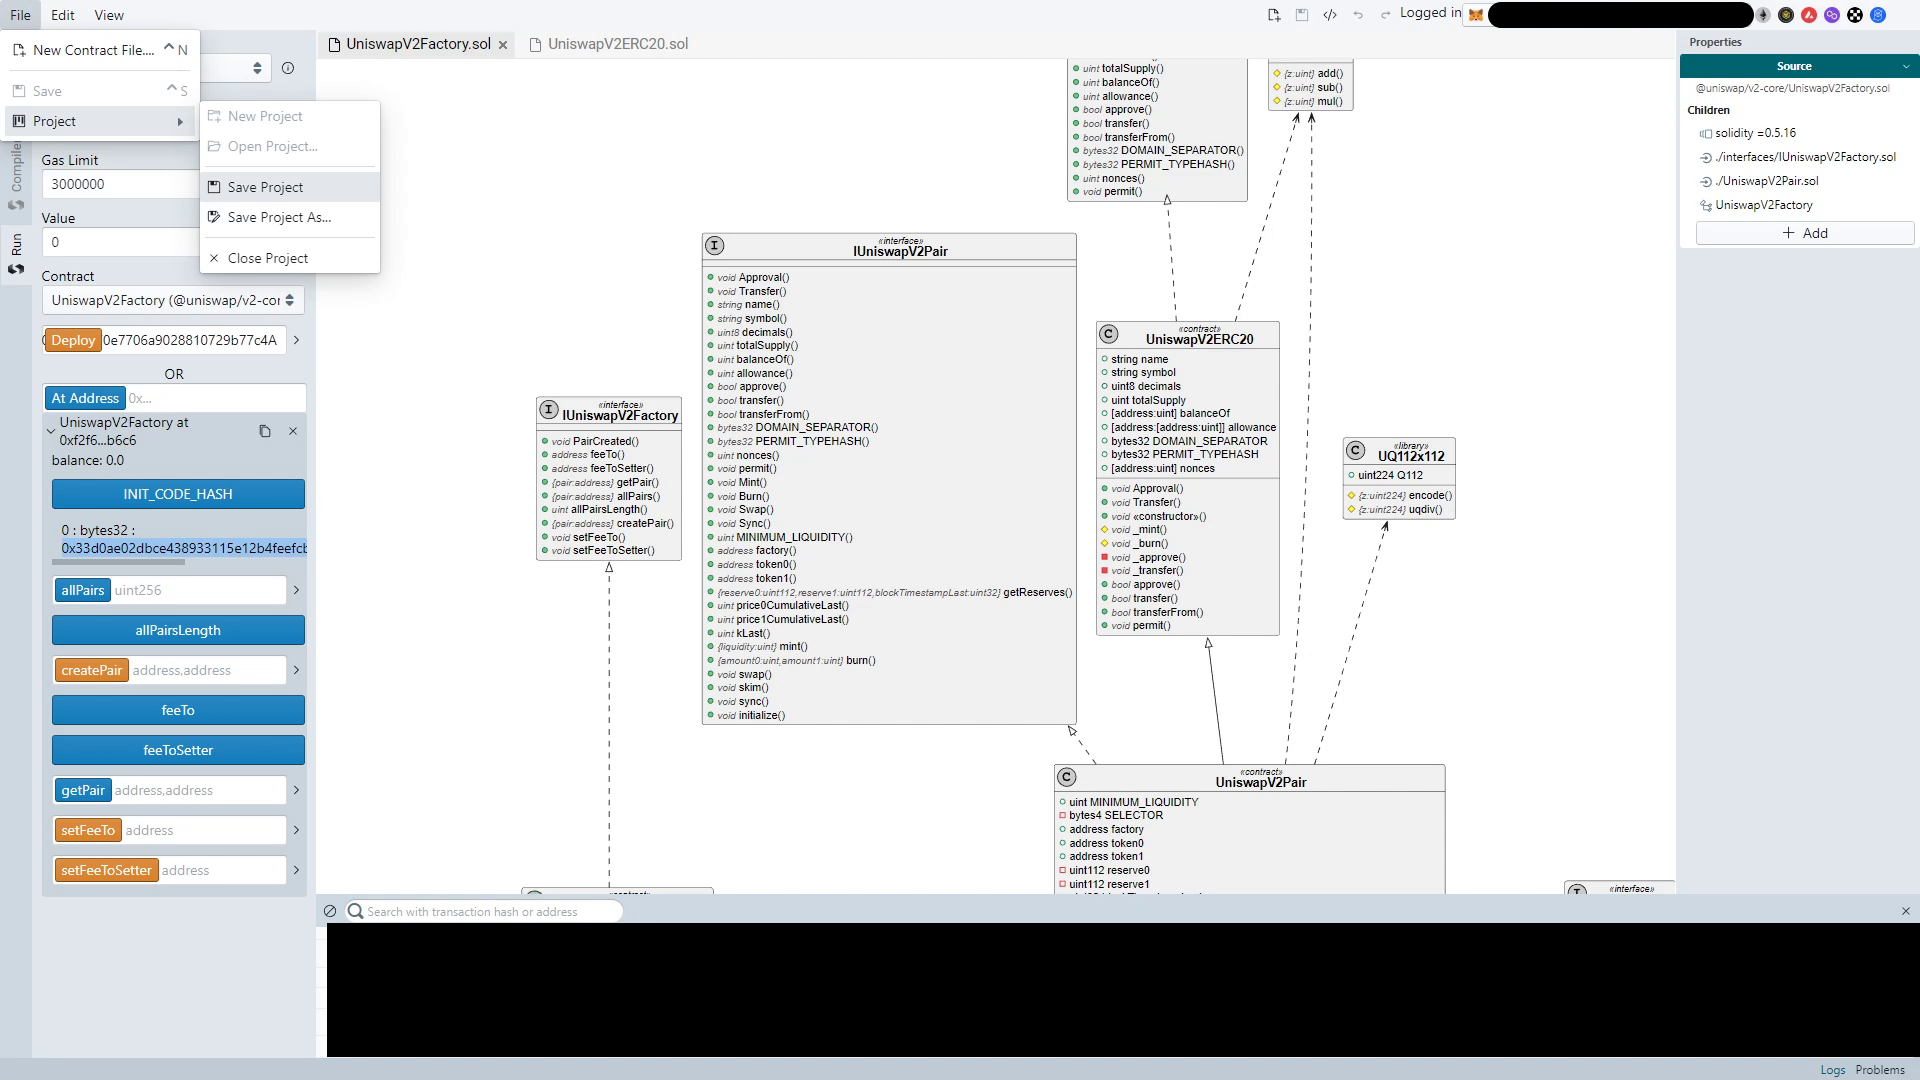
- Let’s save the project through File -> Project -> Save Project. This process will commit the project files to your Github repository
Deploying Uniswap V2-Periphery
As we did with UniswapV2-core, we’ll import the UniswapV2 Periphery to our existing “@uniswap” folder.
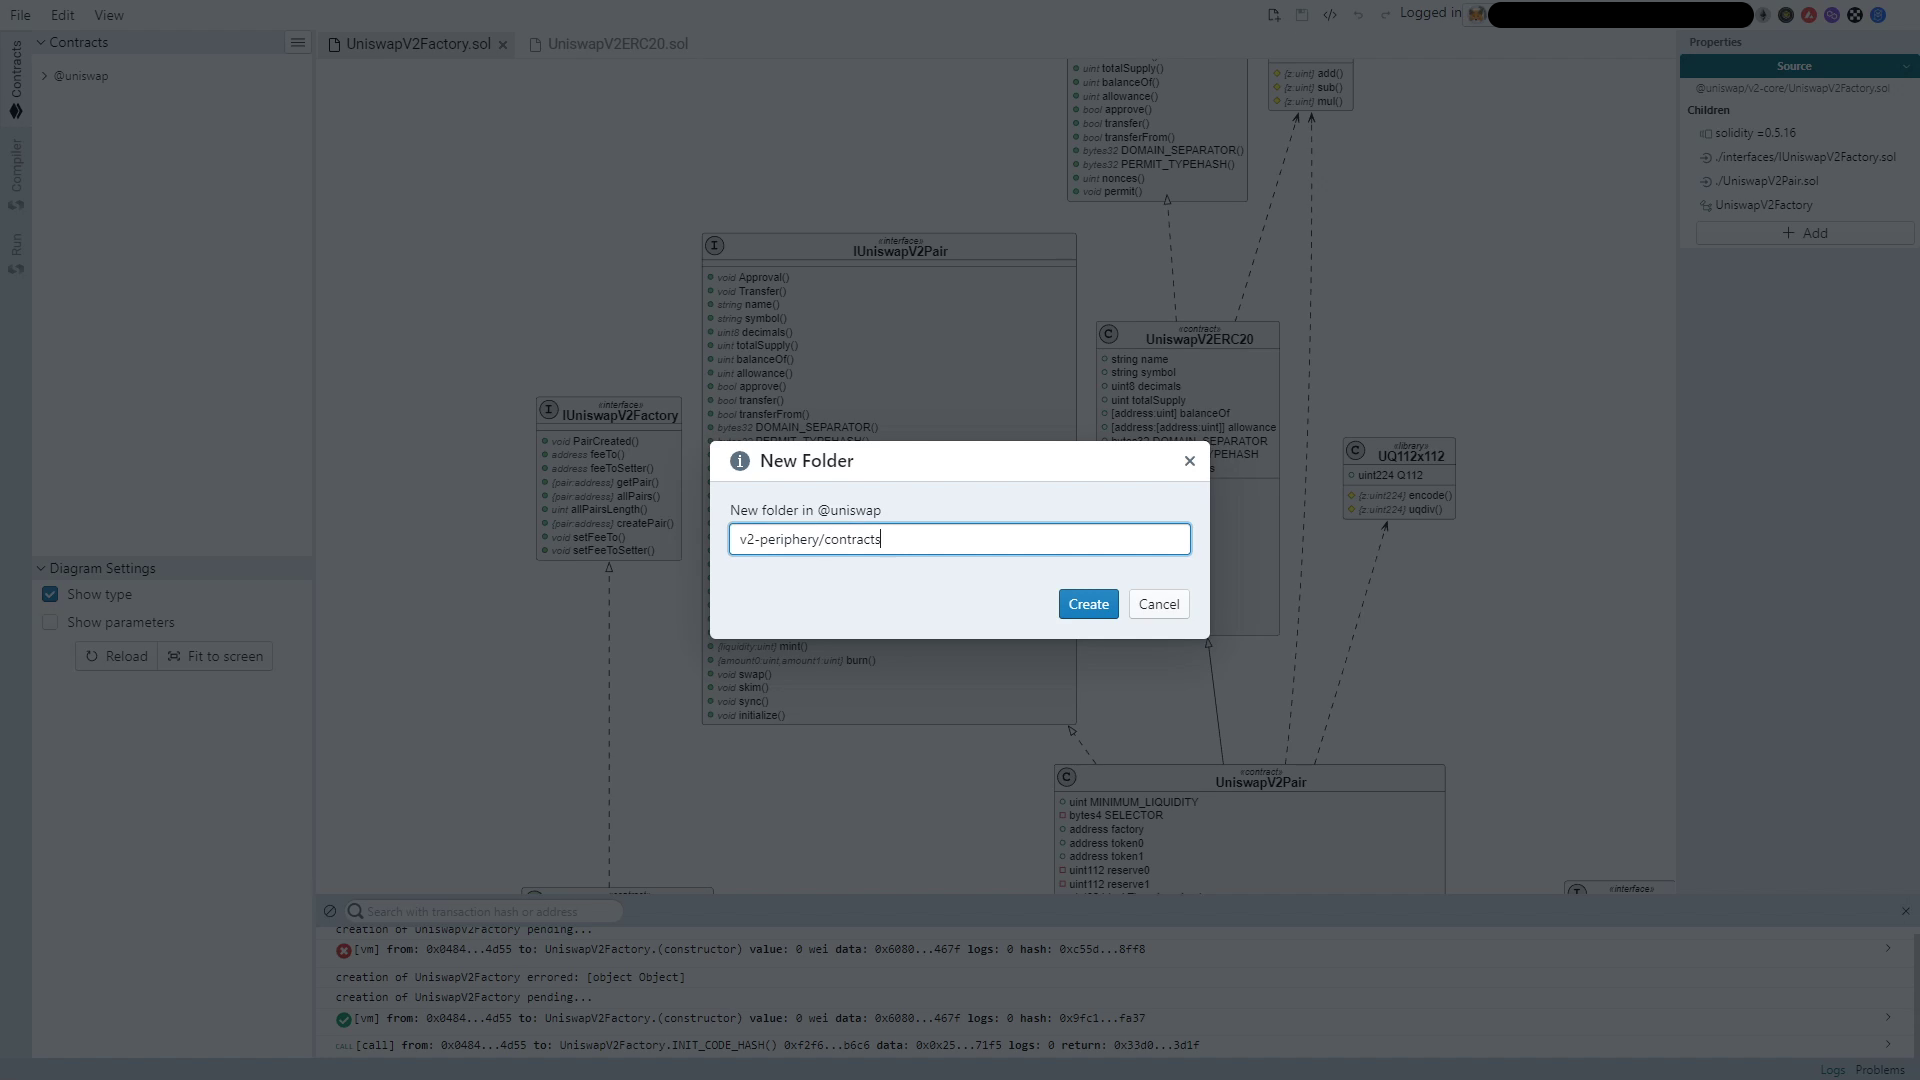
- From the sidebar menu, create a new folder called “v2-periphery/contracts”
- Now let’s import the v2-periphery files from Github
- In the “v2-periphery” directory you made, import the Periphery files from github using this link: https://github.com/Uniswap/v2-periphery
- The Uniswap contracts depends on a few items in its universal library. Let’s create a new folder under @uniswap titled, “lib/contracts” and import these contracts into that folder: https://github.com/Uniswap/solidity-lib/tree/master/contracts

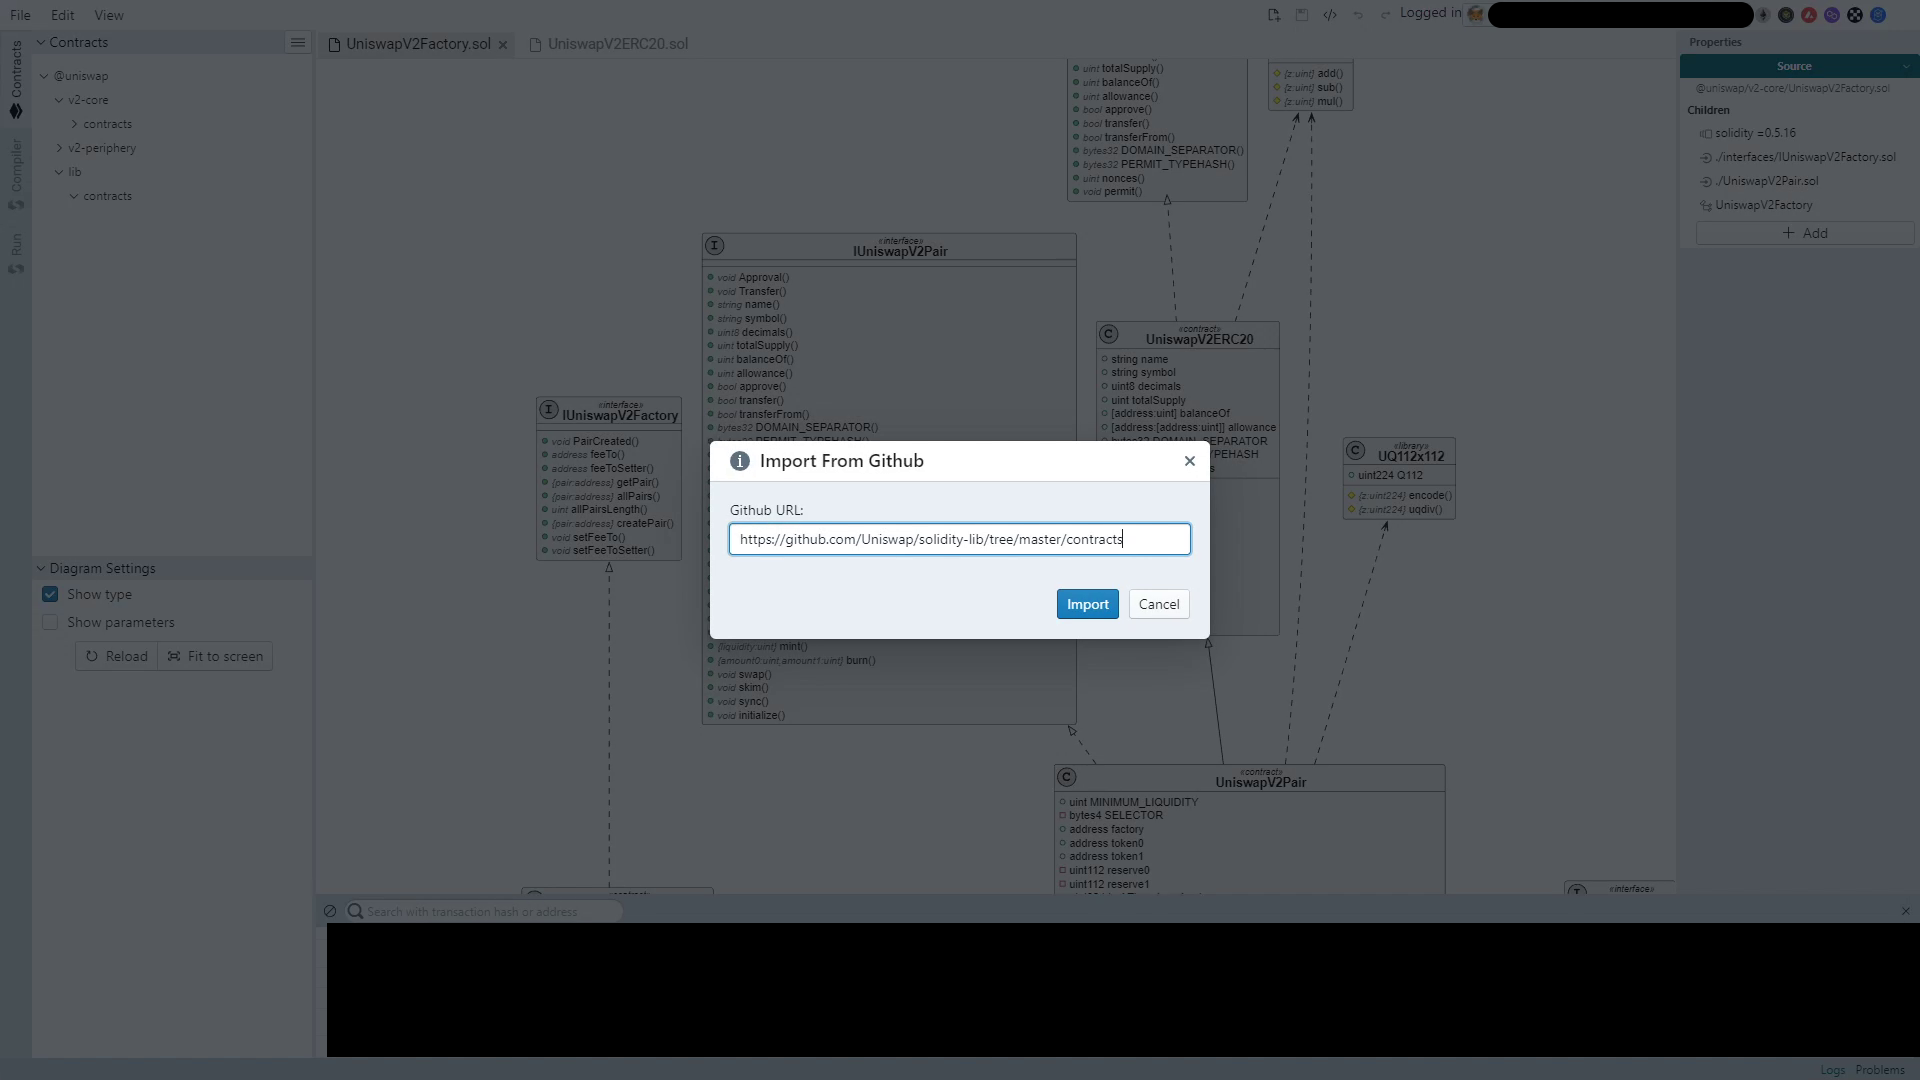
- As long as this is imported correctly into the @uniswap directory, everything should work as expected.
- Once the deployment is complete you can see the deployment details in the ‘Logs’ console.
- You will also be able to see all contract functions in the Run tab
- Let’s call ‘INIT_CODE_HASH’ to get our contracts hash. Store this value somewhere.
It will look something like this:
0x33d0ae02dbce438933115e12b4feefcb296d98c7f79c5df5534a3cd9c6d93d1f - You will also have to copy the contracts address and store that as well as we’ll need it later on
0xf2f659fa32c0dca71fa01d42d05158cf9082b6c6 - We’ve now successfully deployed the UniswapV2 Factory
- Let’s save the project through File -> Project -> Save Project. This process will commit the project files to your Github repository
We’ll only edit one value in the contract file and then move onto the deployment. In order to deploy these contracts we’ll need to use a few of the values we copied from the Factory deployment.
- Navigate to the compiler tab and ensure the auto-compiler is selected. Turn optimizations on and for the optimization value select 1
- Next find open “@uniswap/v2-periphery/contracts/libraries/UniswapV2Library.sol”
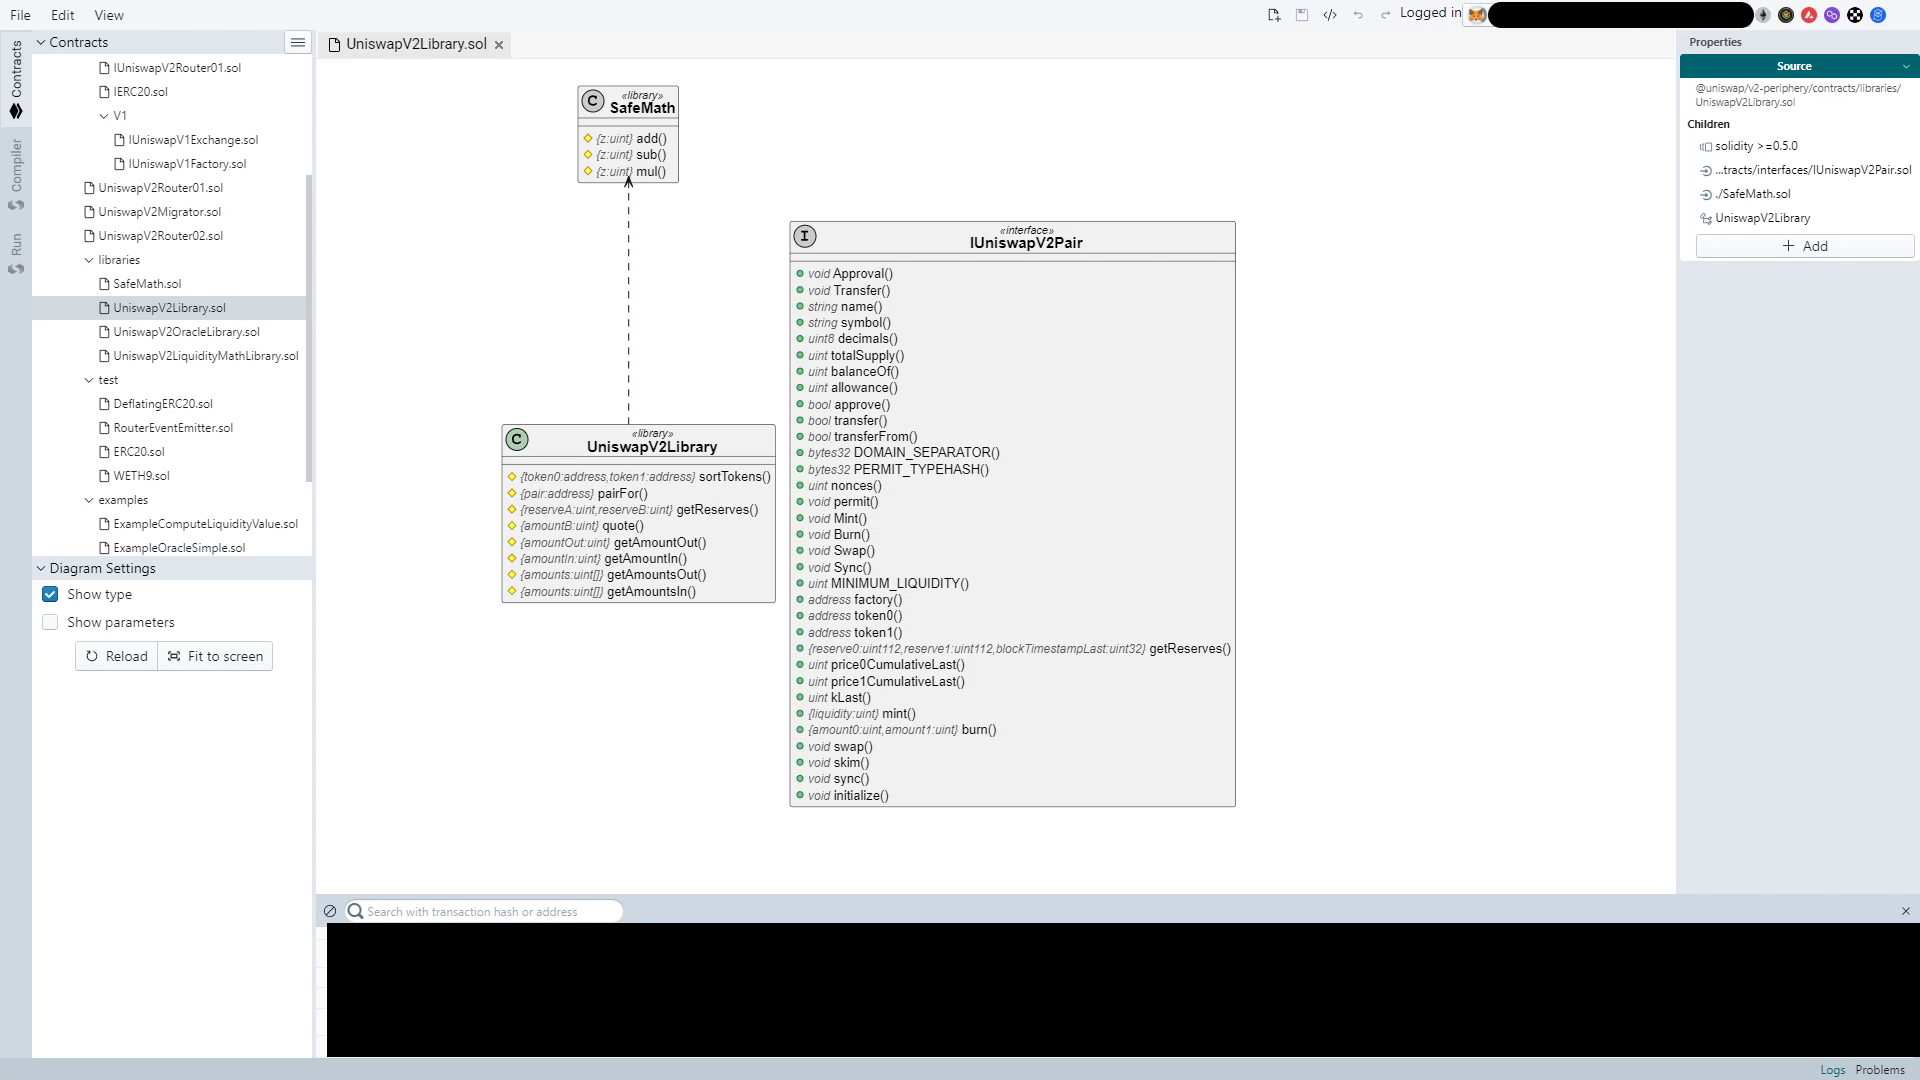
- Select the UniswapV2Library library and select the pairFor function.
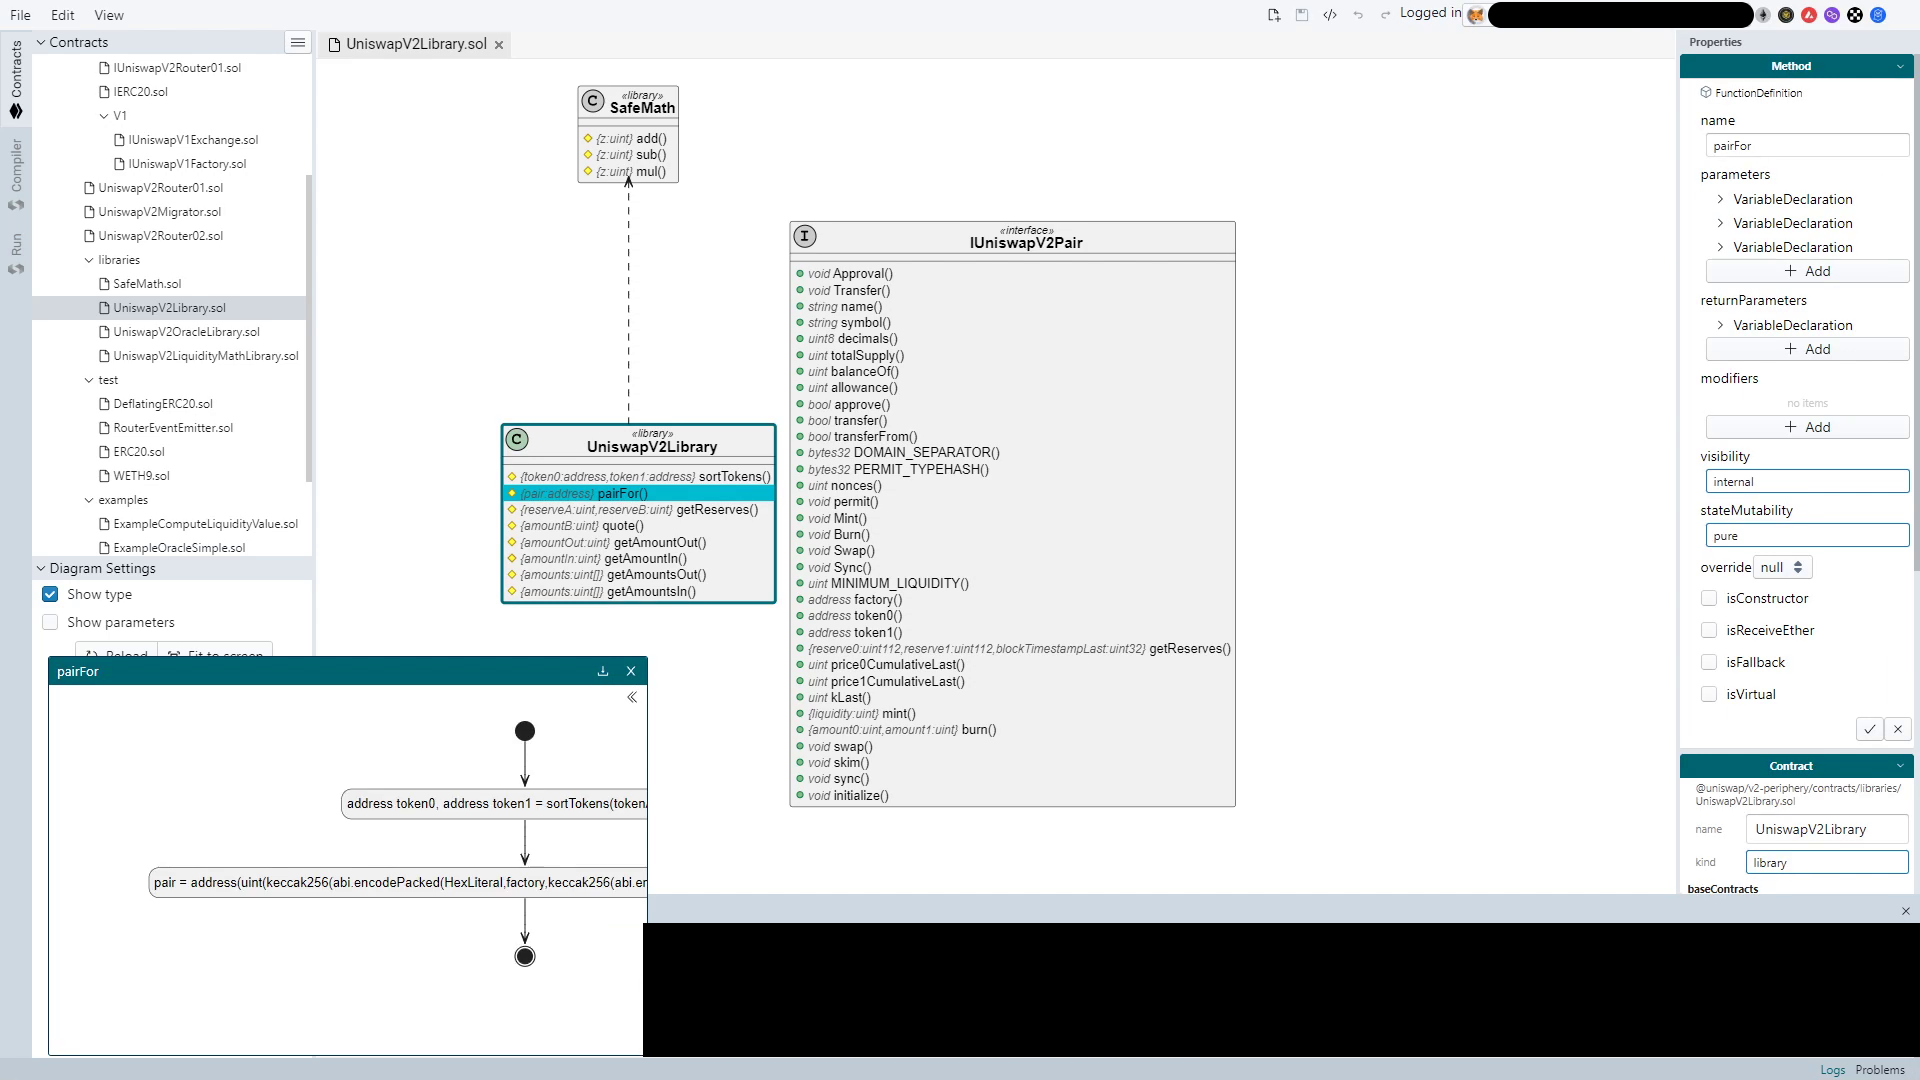
- This will open the function in the Micro View which allows you to edit function logic through activity diagrams.
- Select the second part of the diagram and expand the ‘right arguments’ FunctionCall. Follow the flow of arguments down until you see these items:
- HexLiteral
- Identifier
- Function Call
- HexLiteral
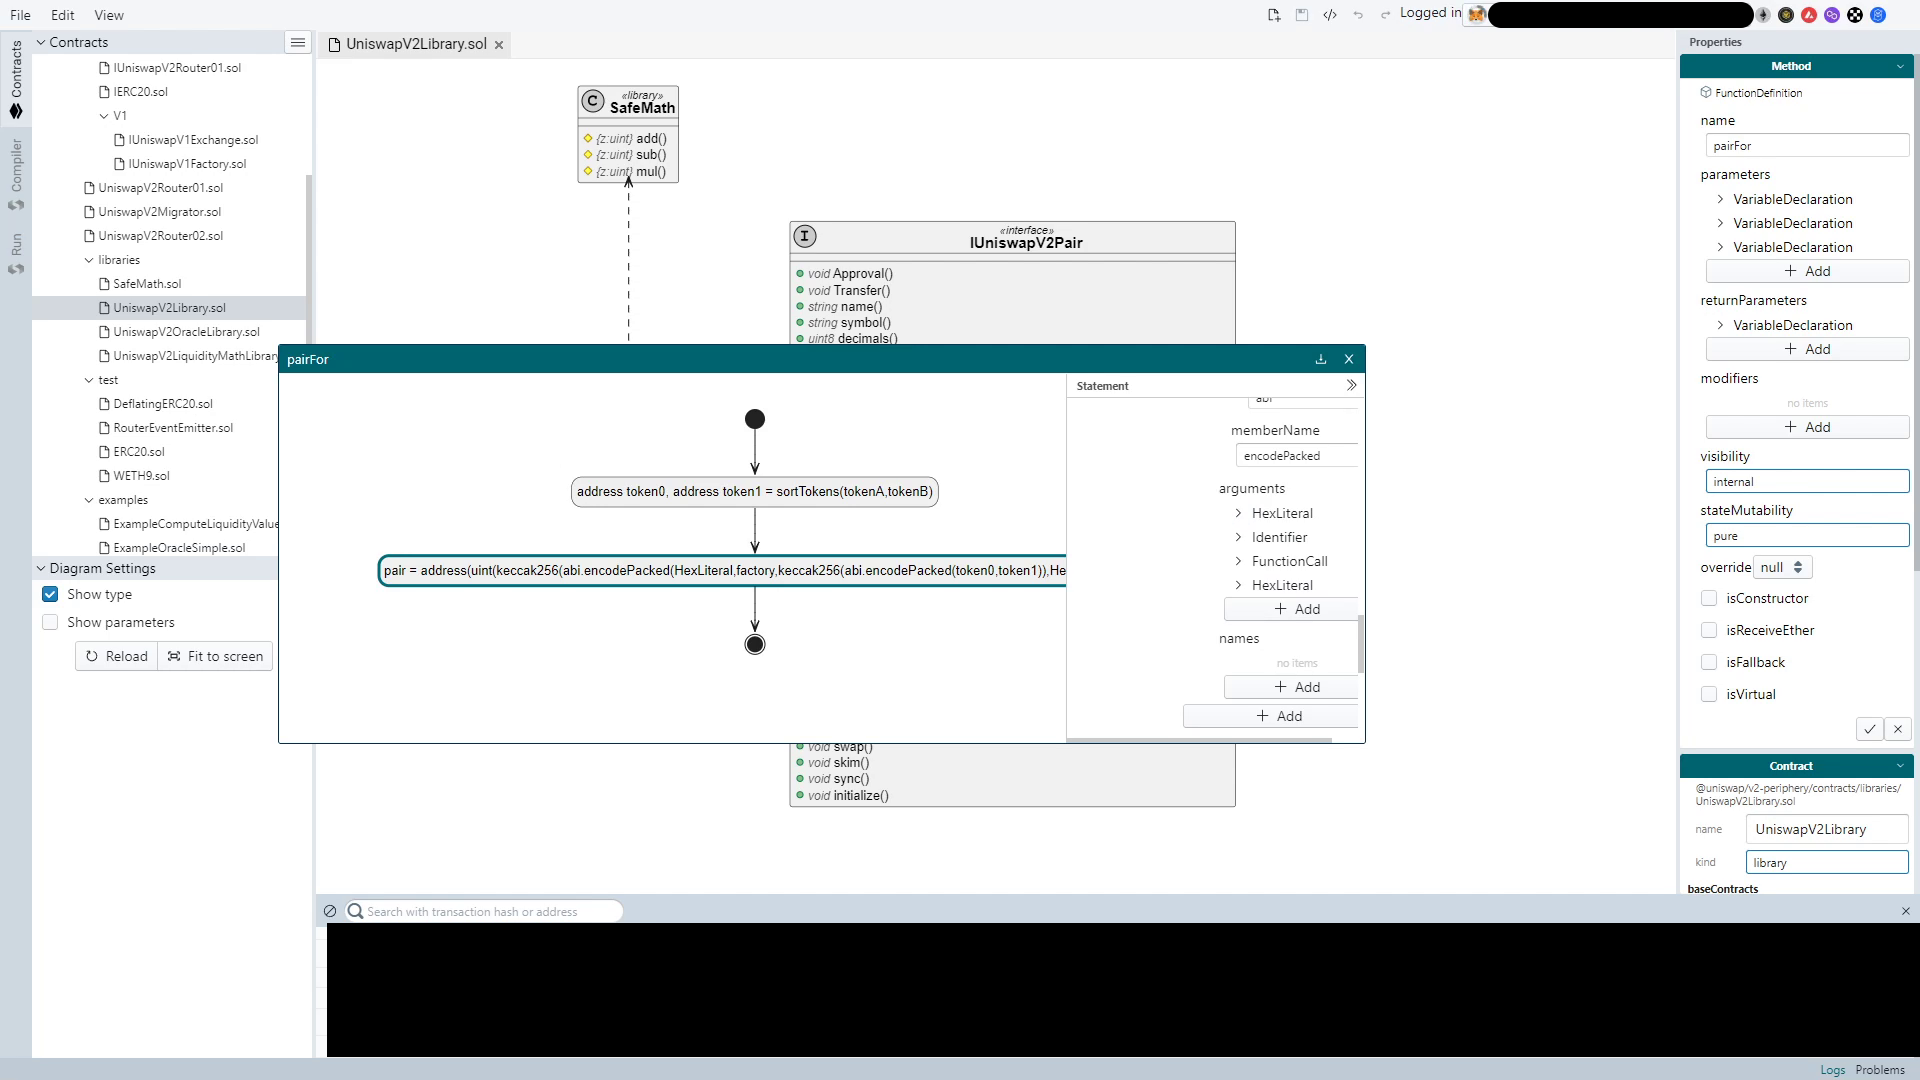
- For the first HexLiteral, change the input to
ff - For the other argument in the ‘value’ field, input the INIT_CODE_HASH value we saved earlier without the leading
0x - Click the checkmark to save your added values
We’re now ready to move onto the deployment. First make sure all your files are saved and then open the compiler tab. Making sure auto-compile is set to true, compile the UniswapV2Library.sol contract and the UniswapV2Router02.sol contract.
Once these contracts are compiled without any problems, you should be able to move onto the Run tab.
- Here you have two options, to test the contract on your local machine you can use the Reactor VM environment. If you’re ready to commit this project to mainnet you can select ‘Injected Web3’ which will use the chain your Metamask wallet is connected to (in the current build the supported chains are: Ethereum, Polygon, Polygon ZK Testnet, Fantom, and Avalanche).
- To deploy the contract you need to insert your Factory contact address along with the WETH address of the chain you’re deploying to. In this case we’re deploying to Ethereum so we’ll use this WETH address: 0xc02aaa39b223fe8d0a0e5c4f27ead9083c756cc2
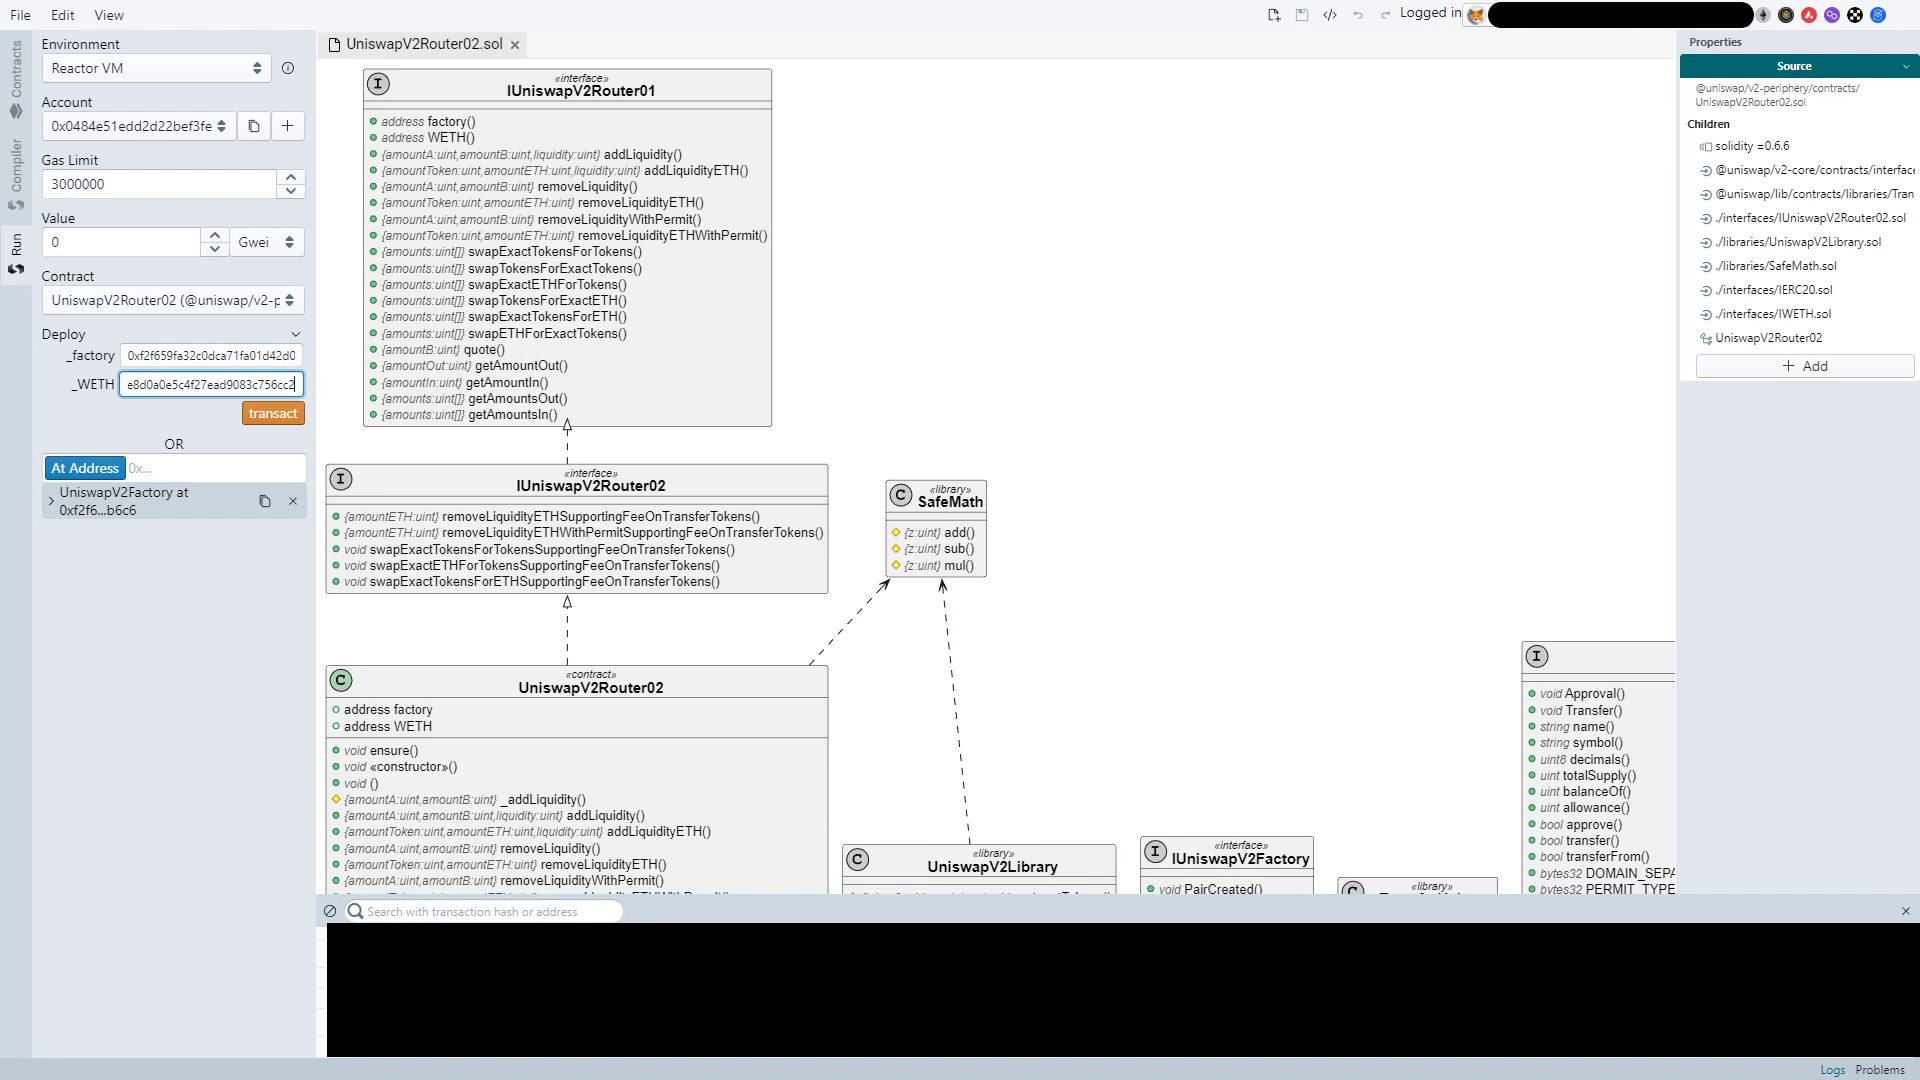
- Hit ‘transact’ and accept the metamask prompt to deploy the contract to the Ethereum blockchain
- Once the deployment is complete you can see the deployment details in the ‘Logs’ console.
That’s it, we can now test our new Uniswap contracts from the sidebar on the Run tab. Each of these buttons correlate to a function within the contract.
Taking this further, you can hook up these new contracts you created to the Uniswap UI. We’ve compiled this UI from sources around the web however since this is not a smart contract nor will it use the ARC Reactor (nor was it created by the ARC Team), the scope is a bit broad for the purposes of this guide.
If you’d like to use the UI to connect your new contracts to and test your Uniswap live, please refer to these files: http://bit.ly/3XmWIIF
To run the UI, use npm run, and to create a build config, use npm build.
Please remember that if you’re facing any bugs or errors, our support team is here to help! Simply leave a message in the #beta-testing channel on our discord server and a member of staff will be happy to help.
Happy hacking!